Update (July 15, 2025): This guide has been reviewed and updated to Ubuntu 25.04
Ubuntu now offers a native ARM desktop build — perfect for Apple Silicon users looking to explore Linux, develop, or virtualise efficiently. In this guide, we'll walk through setting up Ubuntu 25.04 (Plucky Puffin) in a virtual machine using UTM, a free and open-source virtualization tool tailored for macOS.
Our previous article detailed how to set up Ubuntu Server with a desktop environment.
Requirements
- UTM version 4.6.5
- Minimum 30 GB free storage
- Ubuntu 25.04 ISO (ARM64)
- macOS 15
- Apple Silicon device (M1-M4 series)
UTM Download
Download UTM version 4.6.5 from the UTM Github releases page Previous 4.x.x versions should also work.
Automatic updates are available for UTM via the App Store Version though this version is paid.
Drag UTM to your Applications folder and verify it opens correctly.
Ubuntu ISO Download
Next, download the Ubuntu 25.04 ARM64 ISO, approximately 3.82 GB, from the Ubuntu website.
This is Ubuntu's first ARM64 desktop build, with LTS variants planned for the future. As a pre-release version, some features may be experimental. Ubuntu 25.04 has a support lifespan of approximately 9 months. We'll keep updating this guide as Ubuntu releases new builds.
With the ISO downloaded, open UTM to create the virtual machine.
UTM Configuration
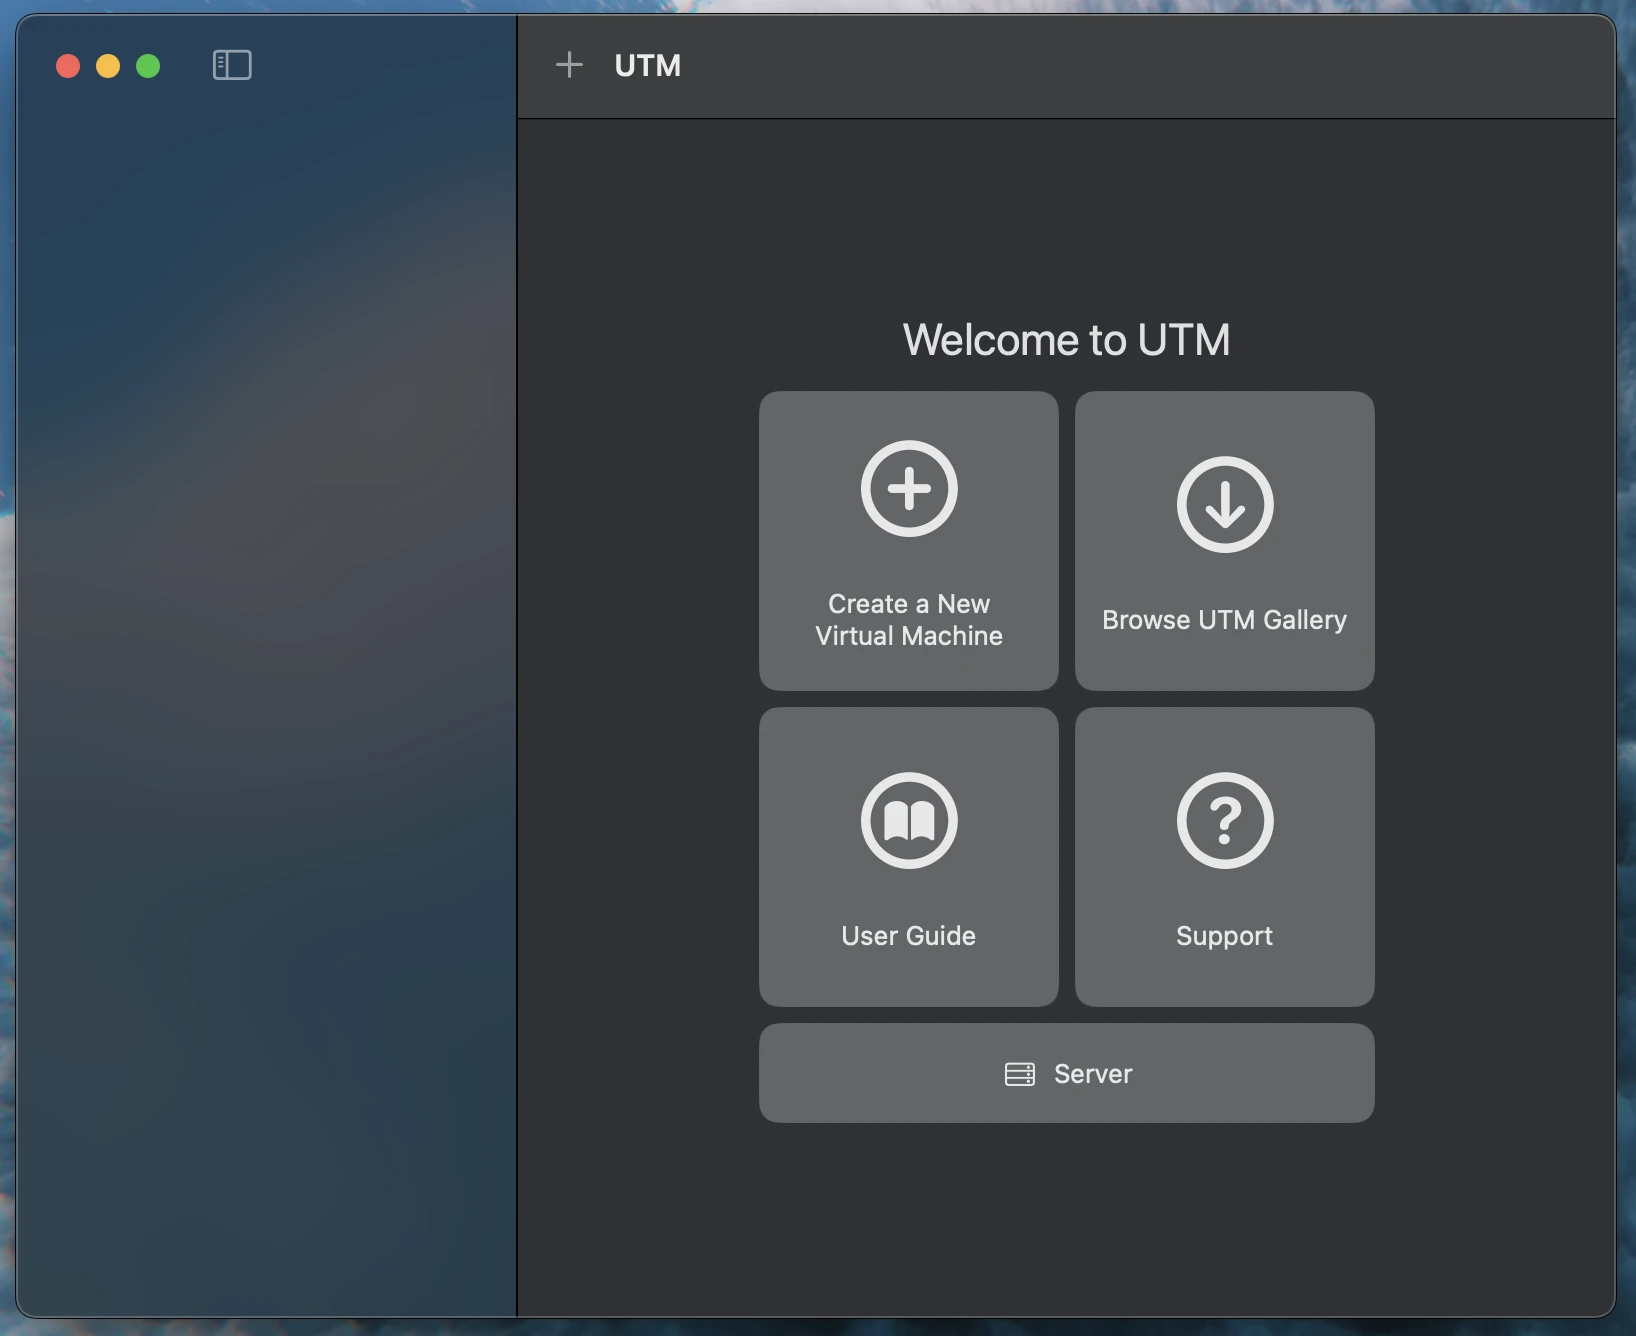
In UTM, click the + icon to start creating a new virtual machine.
Virtualise or Emulate
UTM offers two modes:
- Virtualise
- Emulate
| Mode | Pros | Cons |
|---|---|---|
| Virtualise | Faster, native ARM support | Can't run x86 or non ARM processors |
| Emulate | Supports non-ARM systems | Slower, potential performance issues |
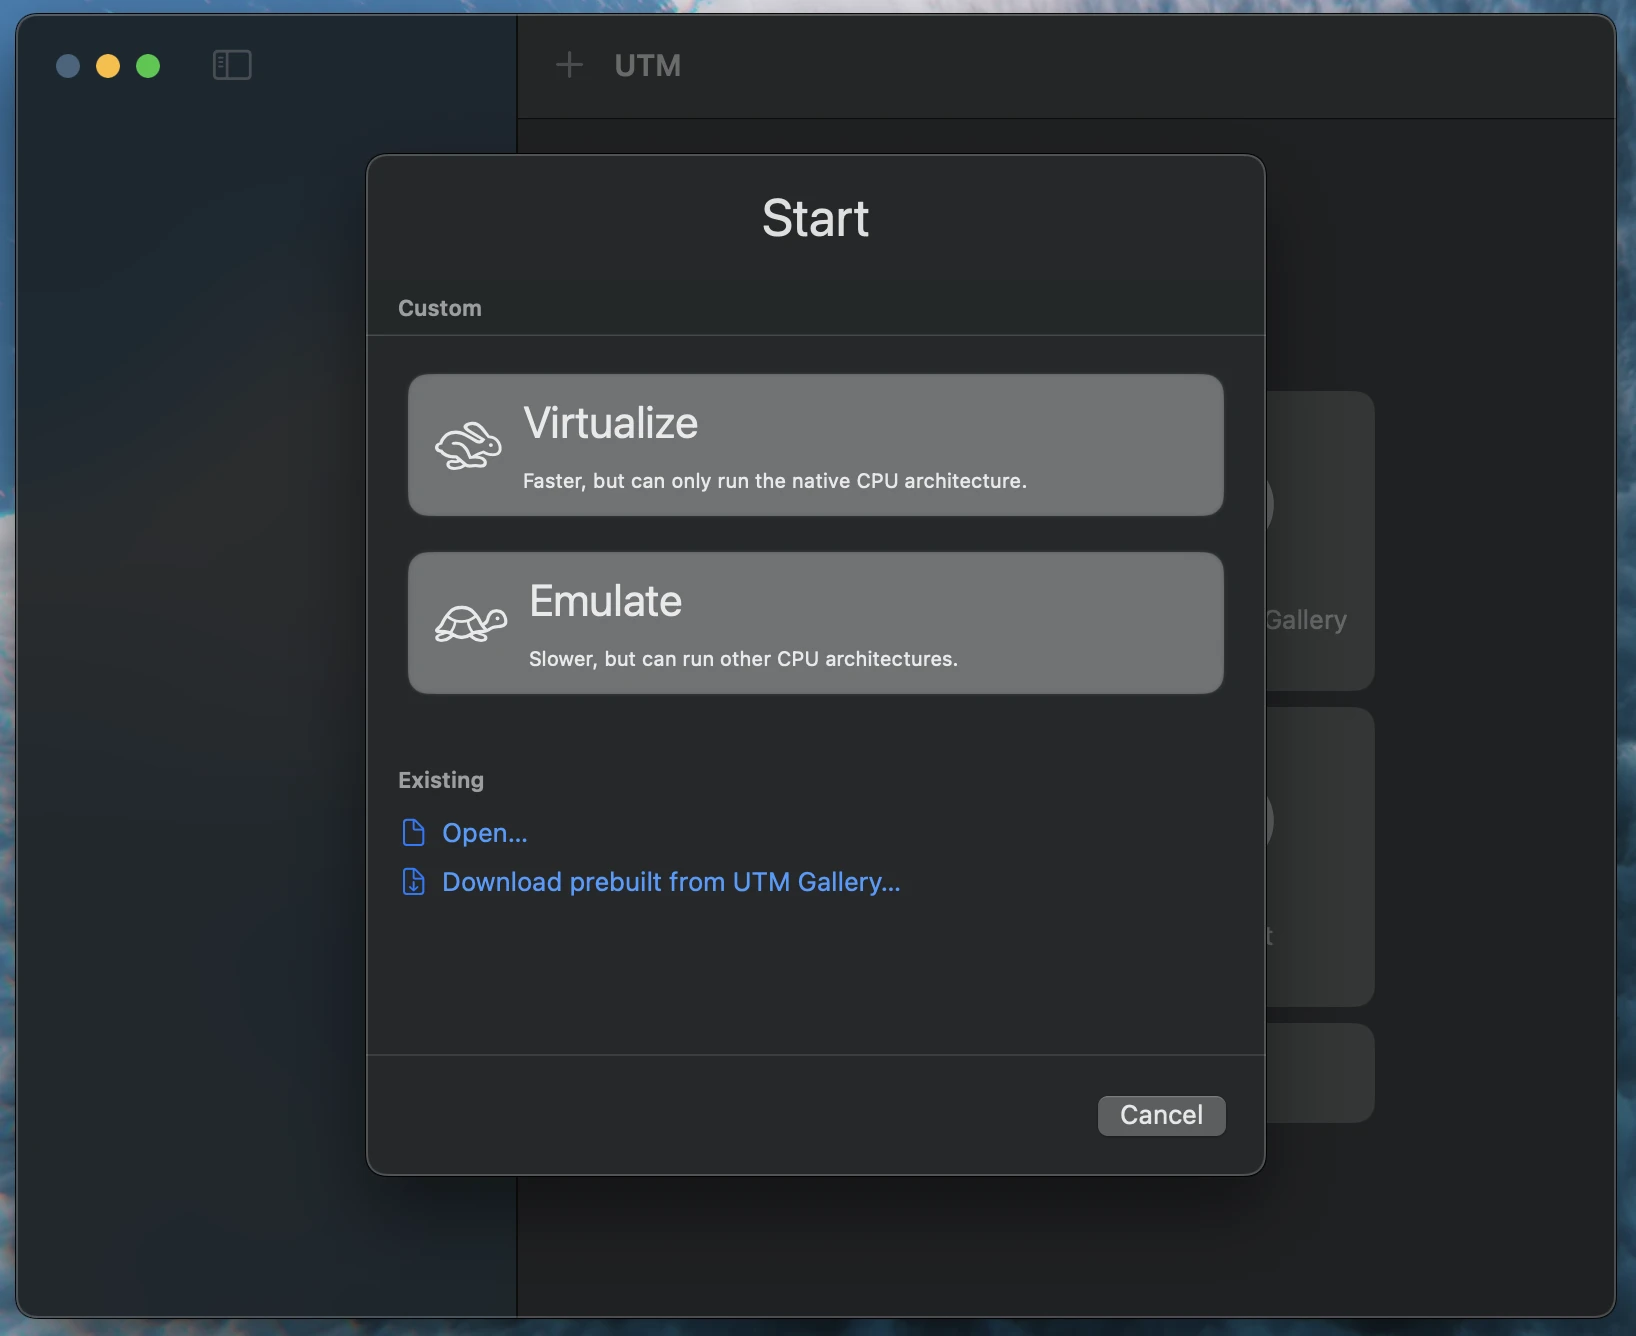
Select Virtualise to leverage Apple Silicon's efficiency.
Emulation is slower but supports older systems. Pre-built VMs are also available via the UTM Gallery
Operating System
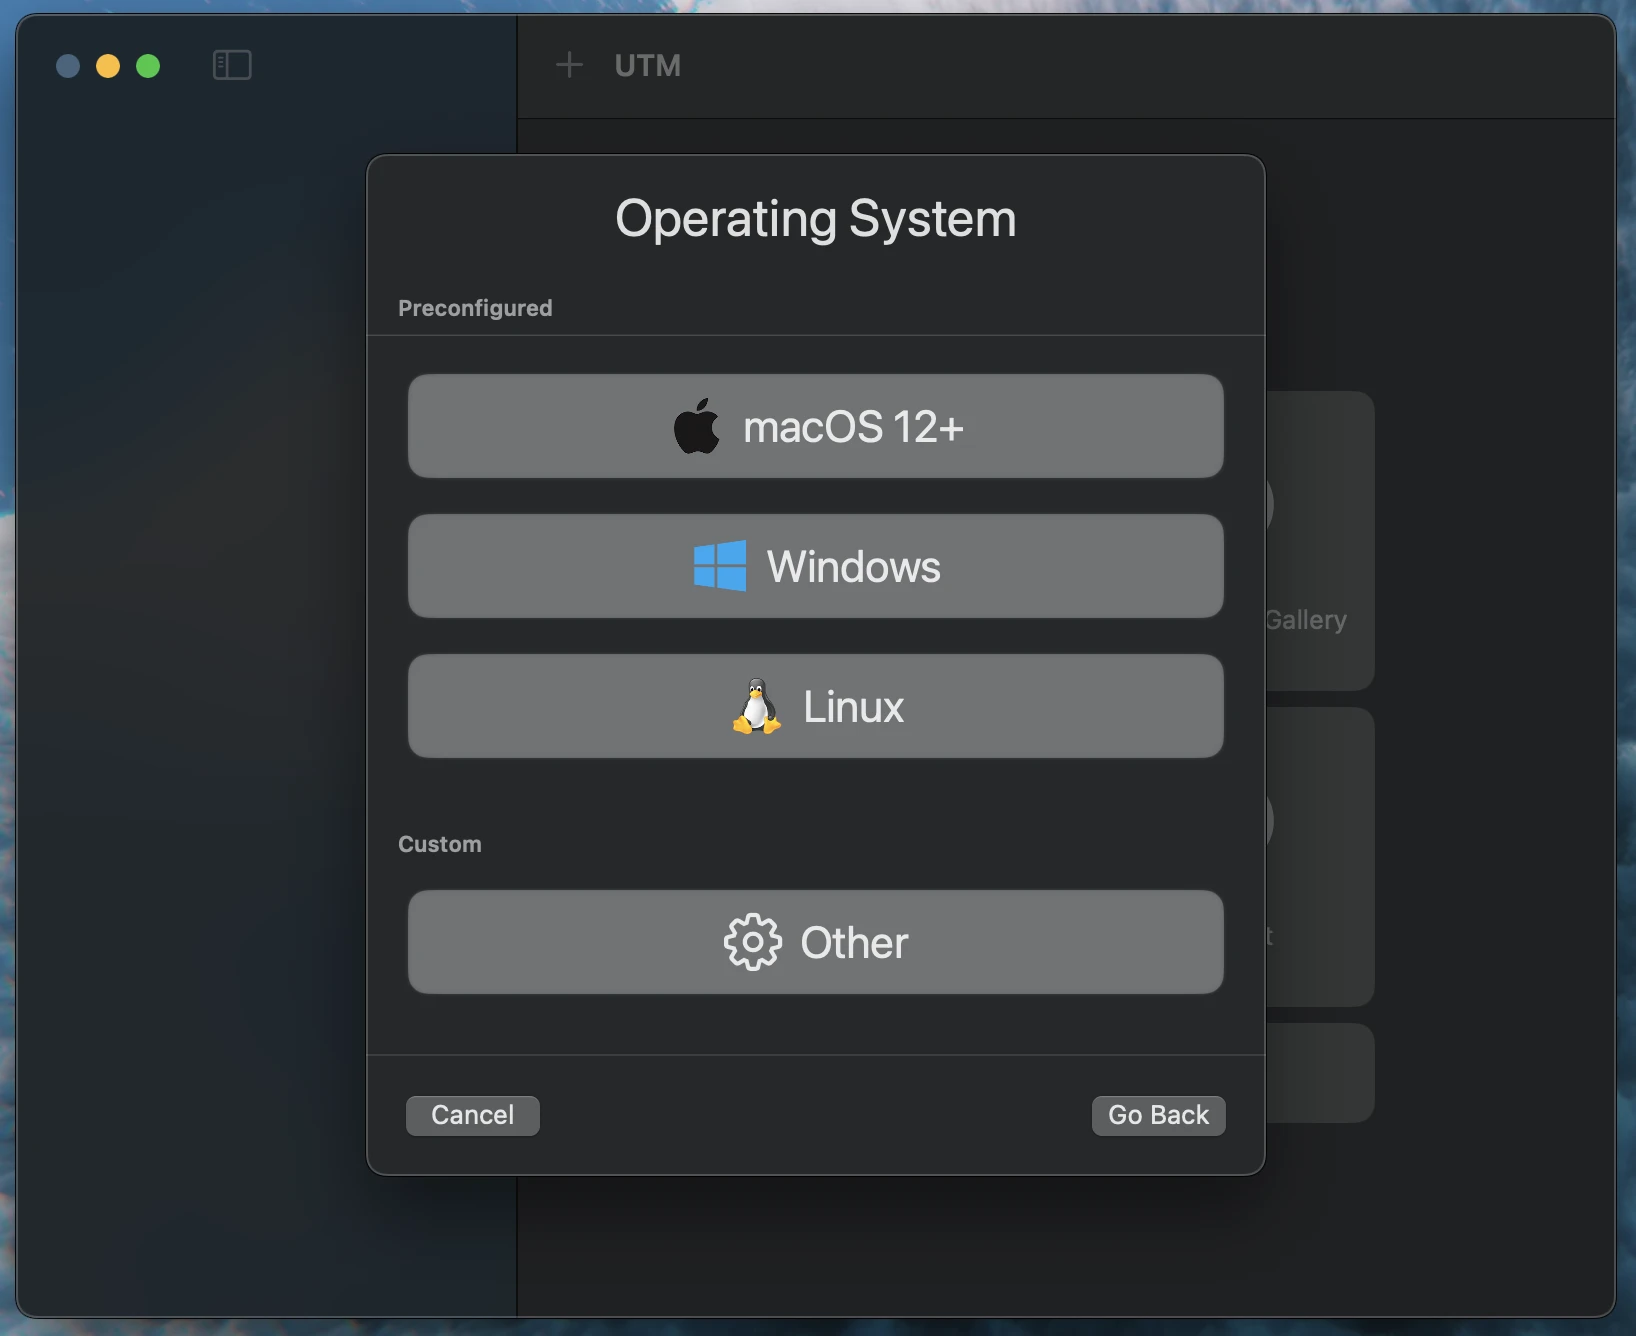
- Choose Linux.
- Enable Use Apple Virtualization for native performance.
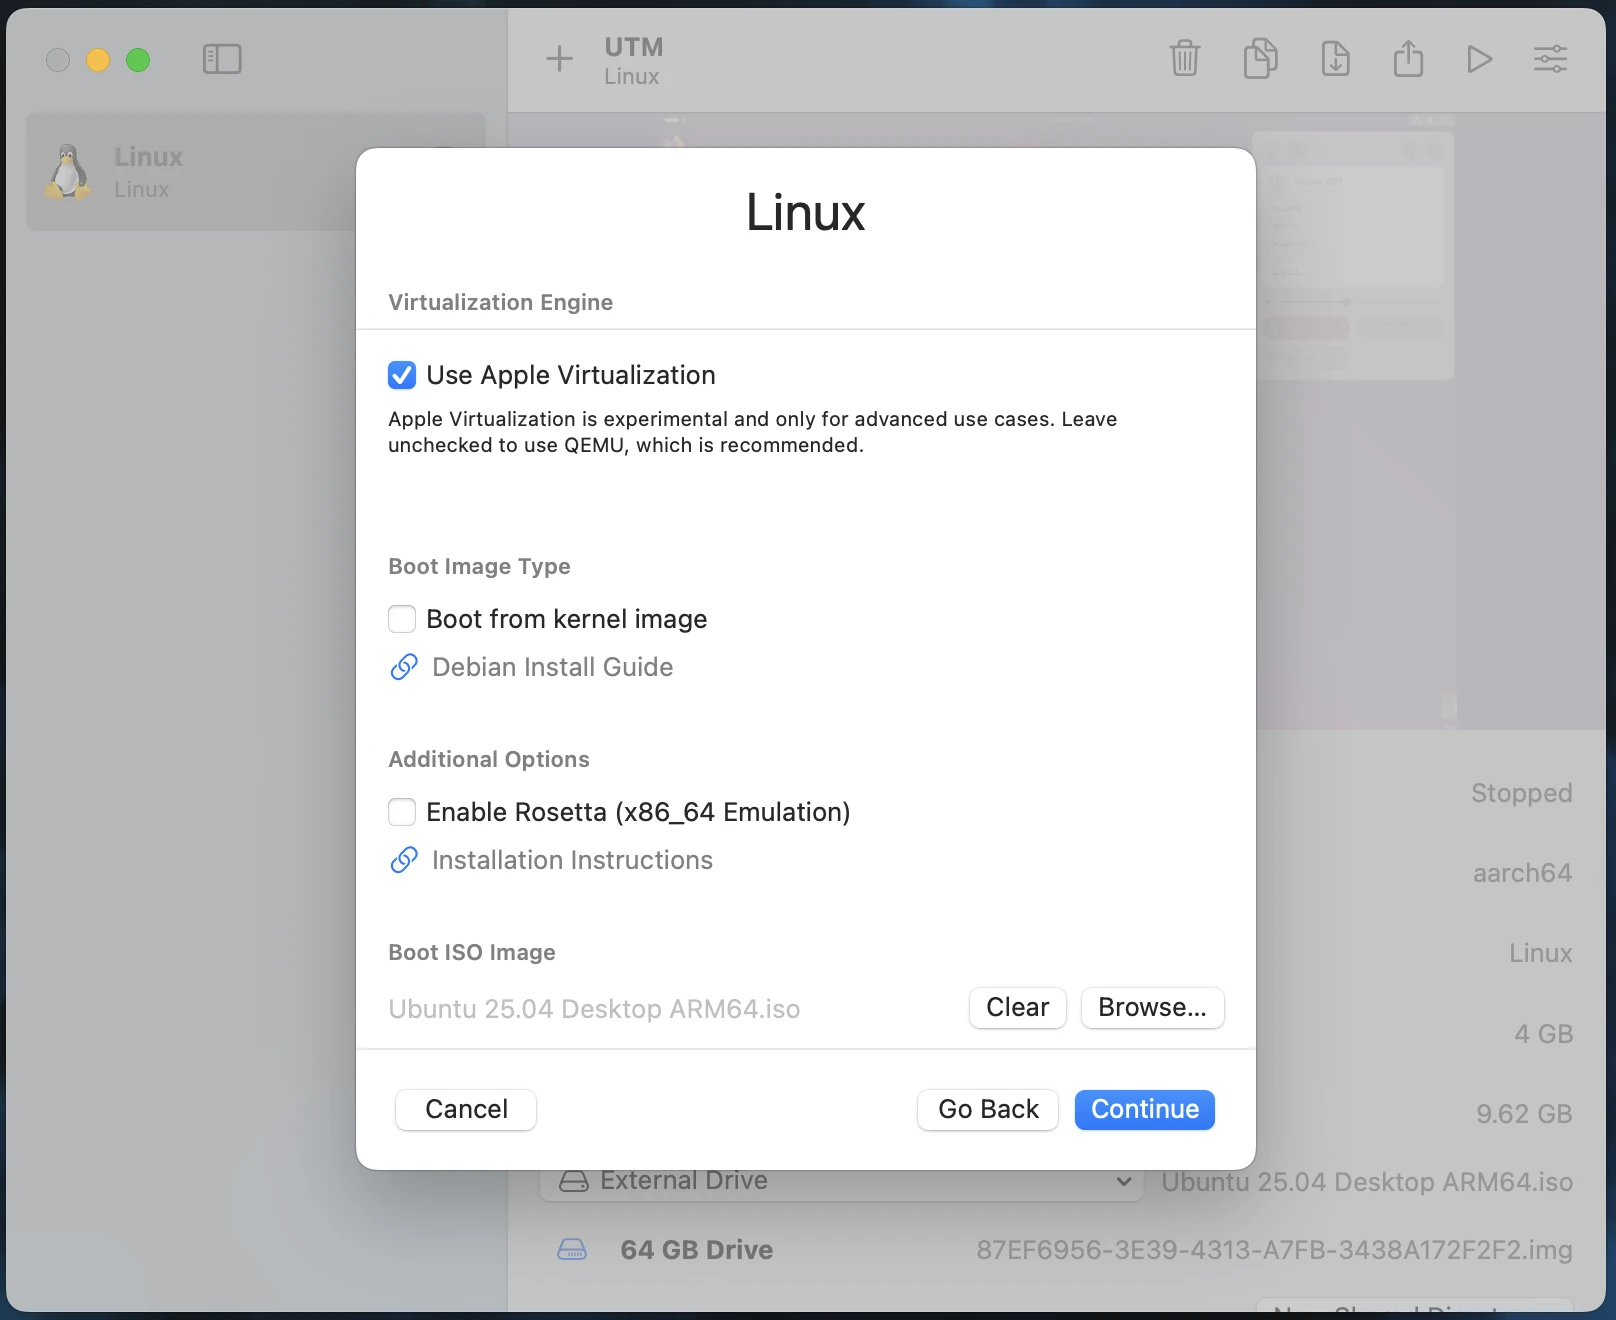
Apple Virtualization optimizes performance on macOS 15, though older macOS versions may work with reduced stability. Alternatively, uncheck Use Apple Virtualization to use QEMU for broader compatibility:
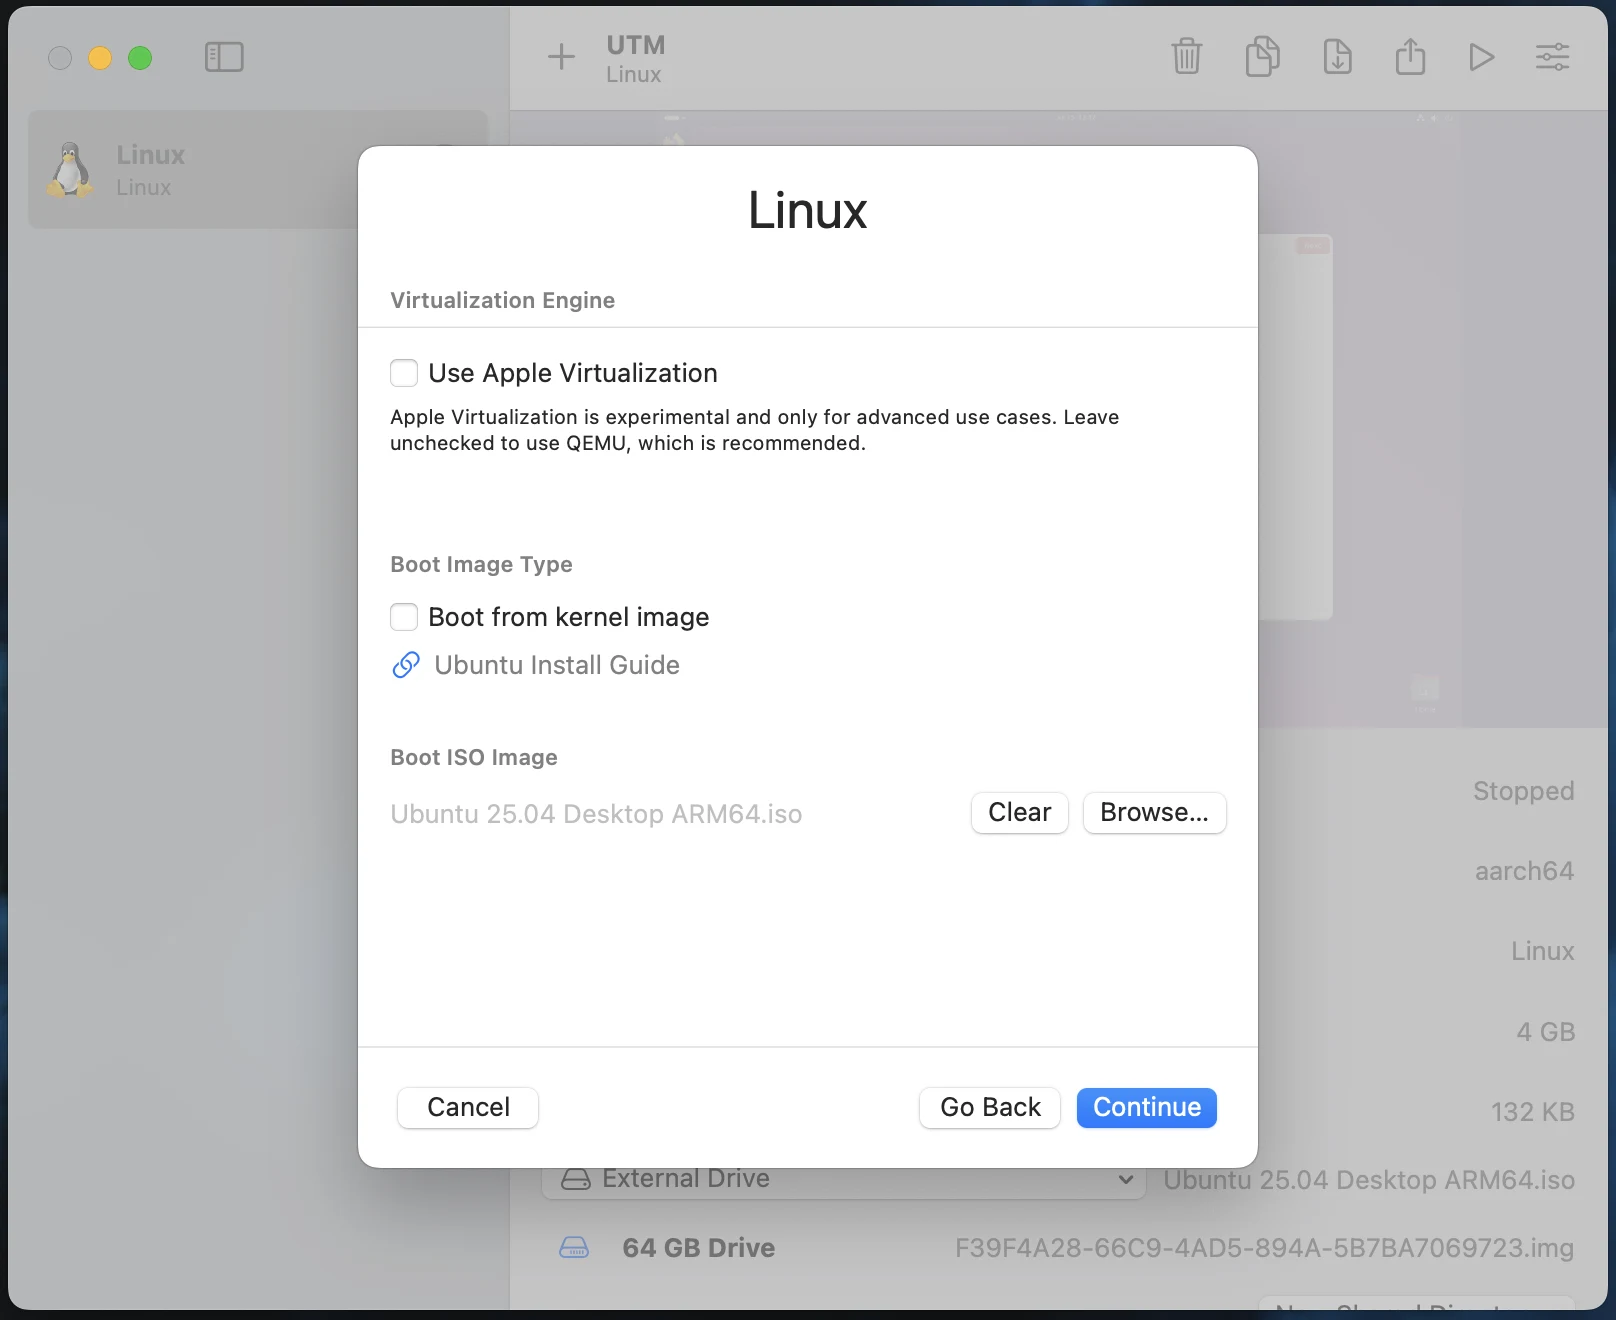
Click Browse, select the Ubuntu ISO, and click Continue.
Hardware Settings
Set RAM to half your device's available memory (default: 4096 MB or 4 GB). Leave CPU cores at the default for automatic management. Click Continue.
Storage
The default storage allocation is 64 GB, which is suitable for most users. Adjust later if needed, then click Continue.
Shared Directory
Optionally, select a folder to share between your Mac and the VM by clicking Browse. Otherwise, click Continue.
Review the configuration summary, name the VM, and click Save.
Your new VM appears in UTM's sidebar. Click the play button to start it.
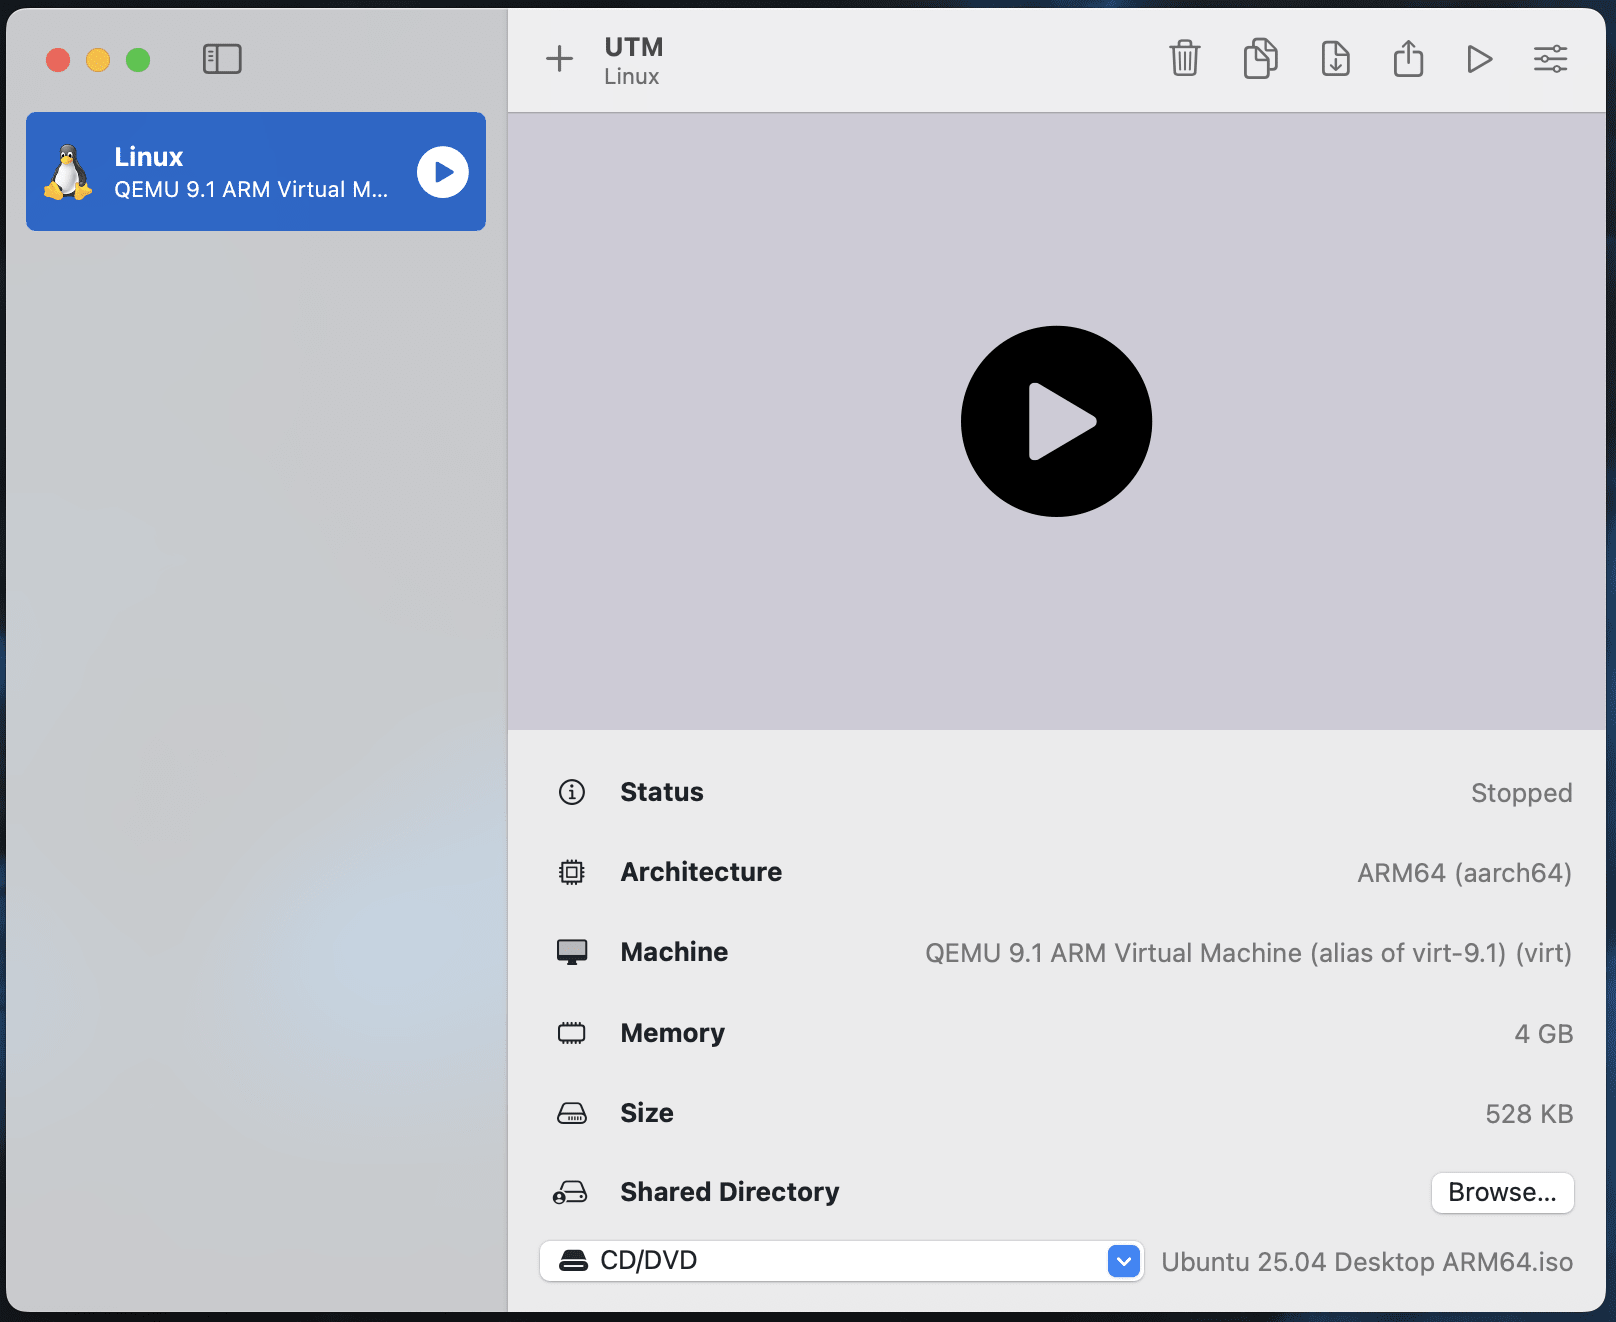
Ubuntu Installation
The Ubuntu setup begins automatically.
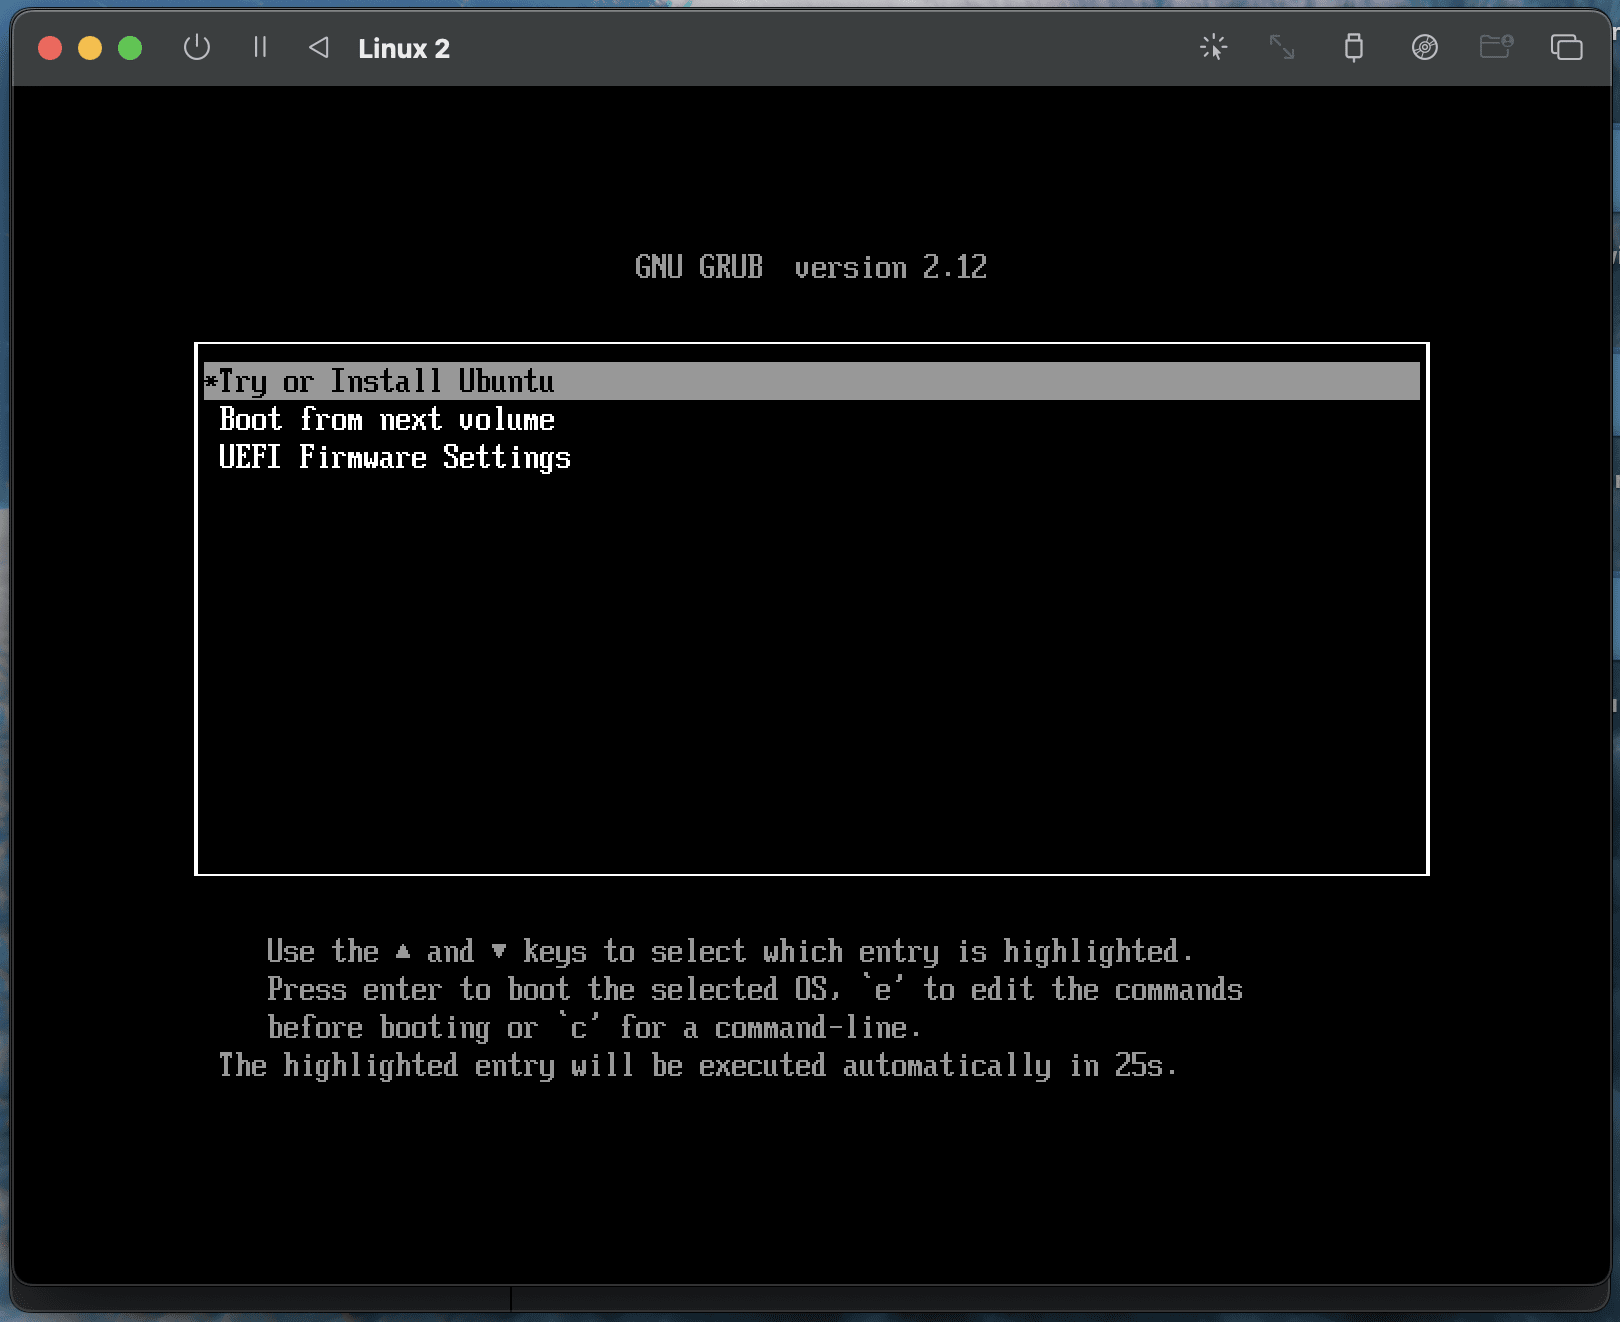
In the GRUB menu, Select Try or Install Ubuntu.
The installer will connect and download necessary files. Display scaling may vary slightly with Apple Virtualization.
You'll arrive at the Ubuntu welcome screen:
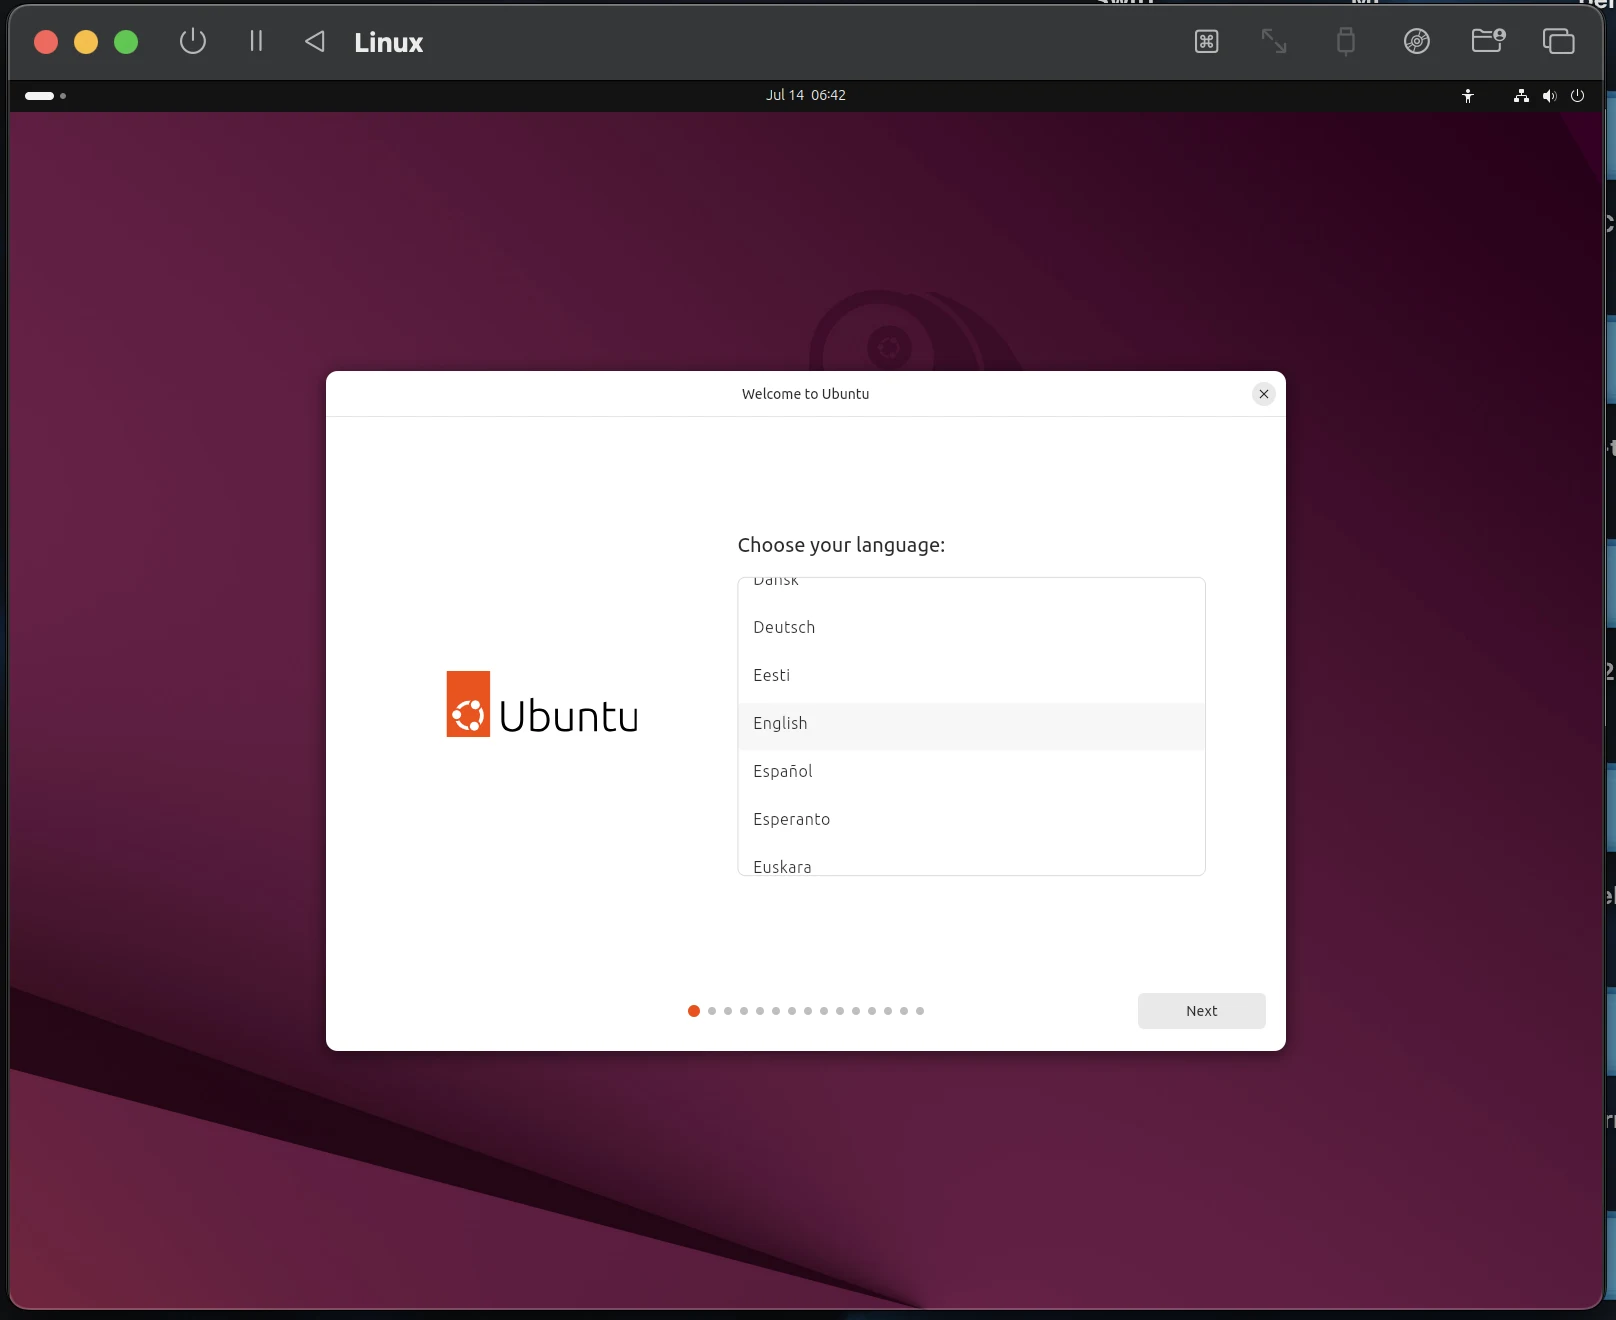
- Choose your language and click Next.
- Accessibility options adjust as needed and click Next.
- Select keyboard layout and click Next.
- Connect to the internet, ensuring Use Wired Connection is selected to share your Mac's Wi-Fi. Click Next.
- Choose Install Ubuntu and click Next.
- Select Interactive installation and click Next.
- Select Default selection for apps and click Next.
- Optionally, enable proprietary software installation (can be added later). Click Next.
- Choose Erase disk and install Ubuntu and click Next.
- Choose whether to encrypt the file system — leave it off for now — and click Next
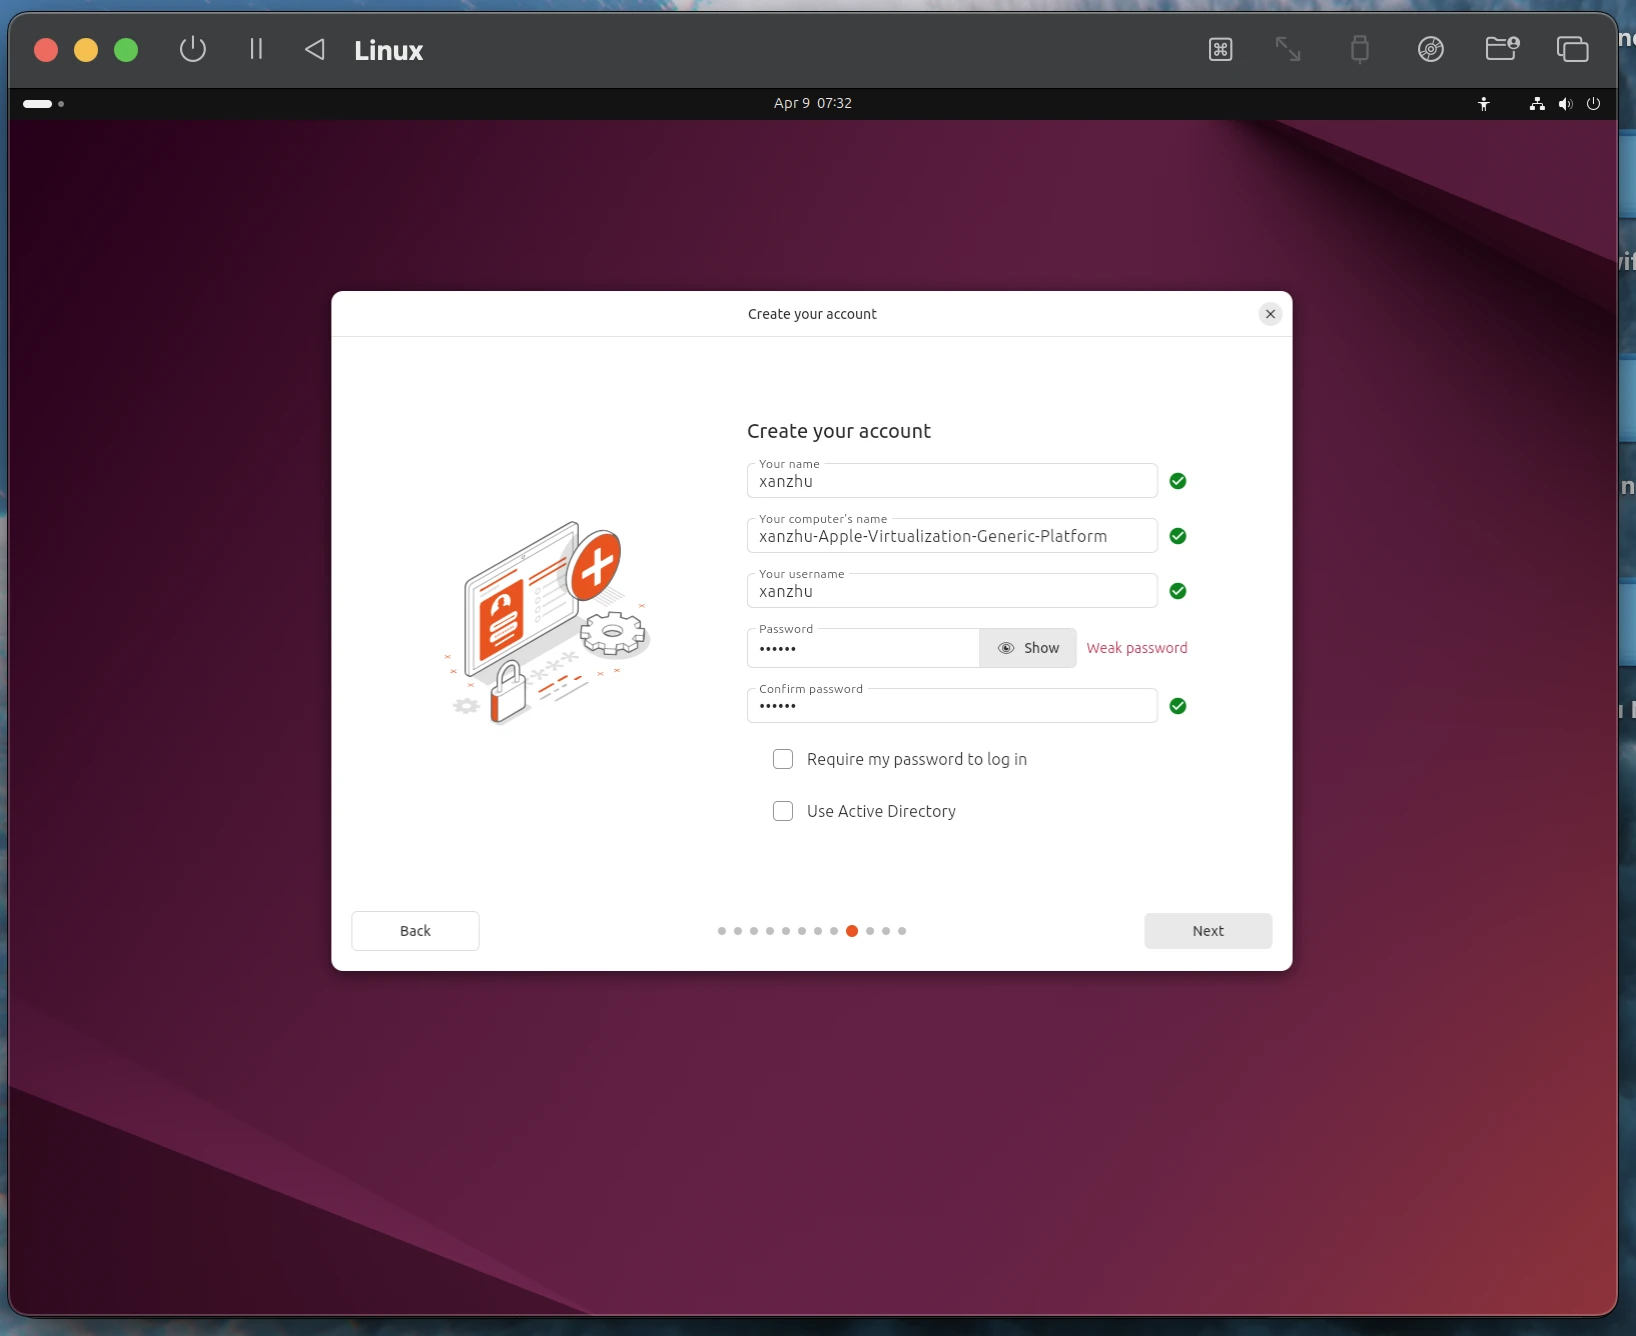
- Enter your name, computer name, username, and a password (e.g., “test”). Confirm the password and click Next.
- Select your time zone on the map and click Next.
- Review your choices and click Install.
The installation will copy and configure files, which may take some time. When prompted, click Restart Now.
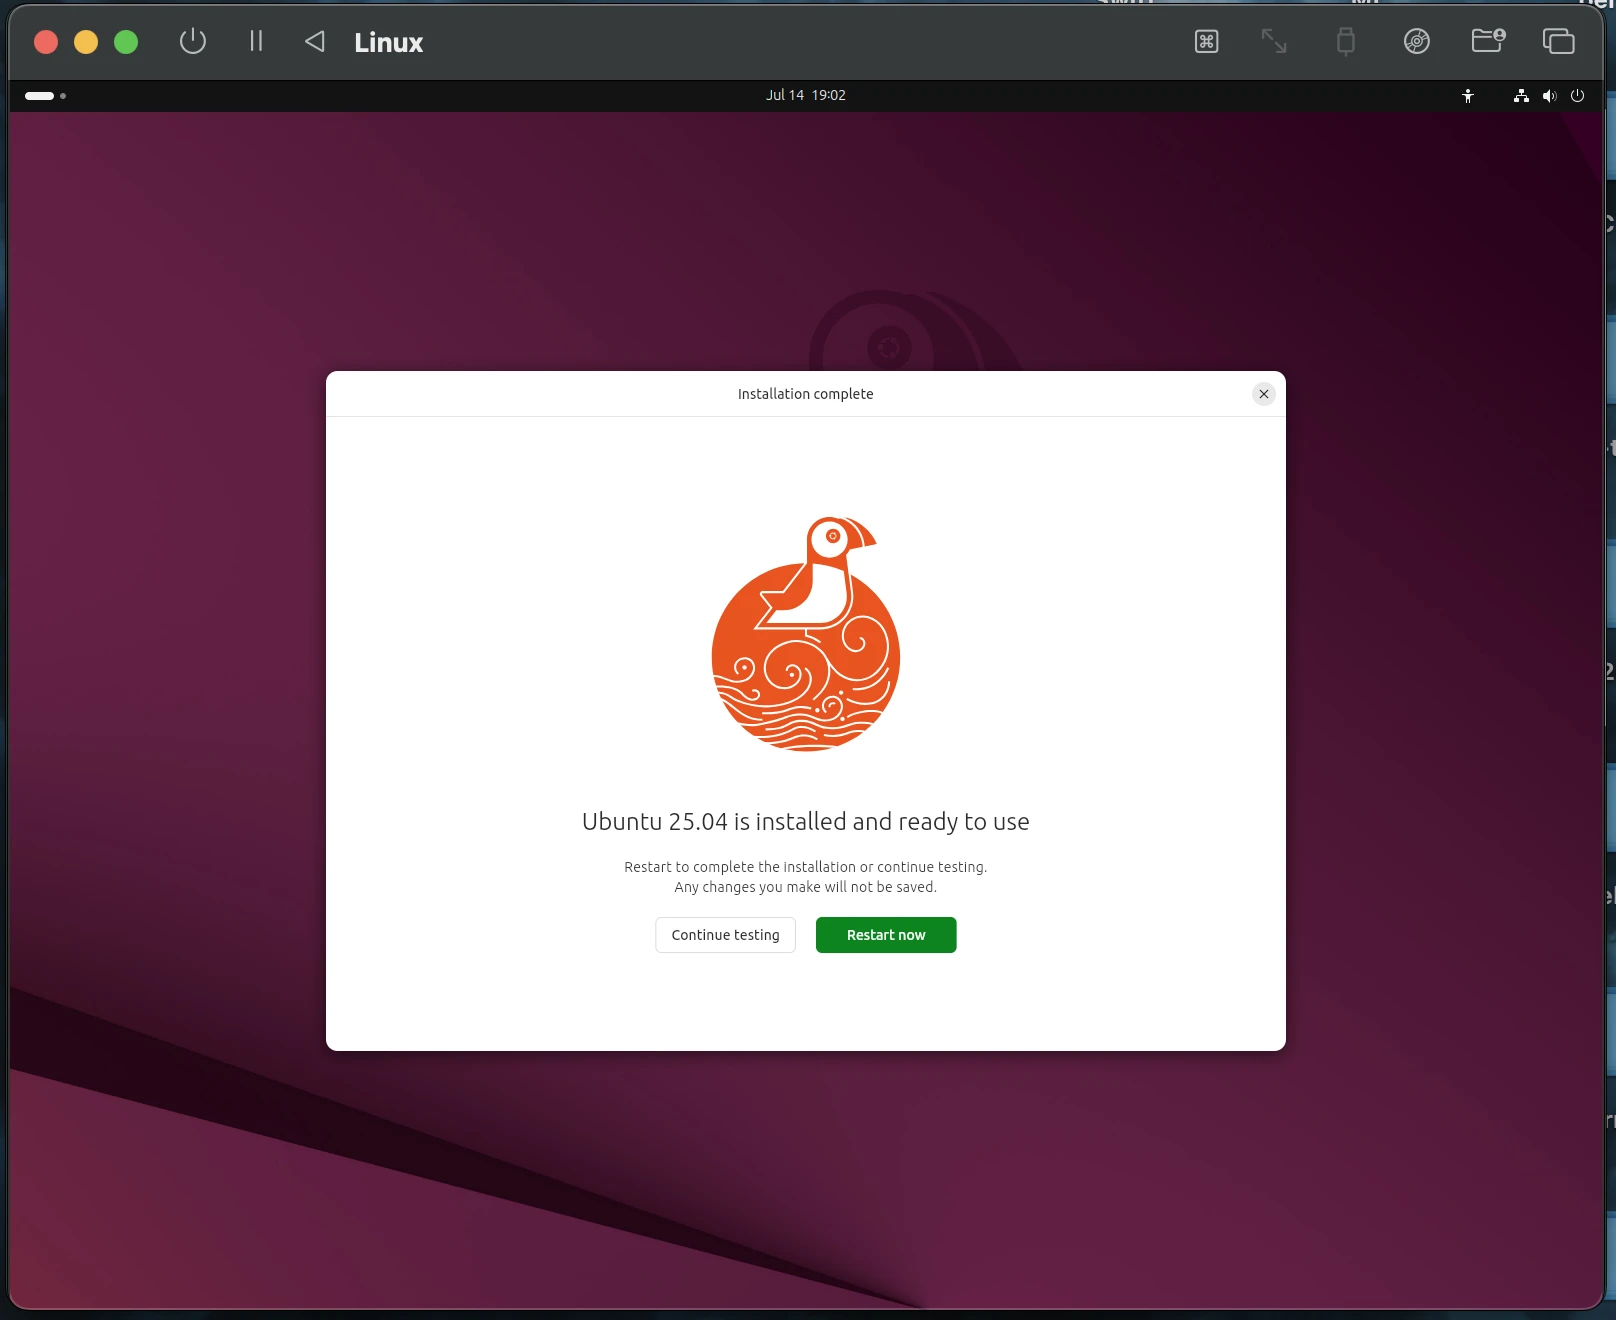
- Apple Virtualization: The VM restarts automatically.
- QEMU: Eject the ISO manually by clicking the disc icon, selecting the ISO, and choosing Eject. Press Enter to reboot.
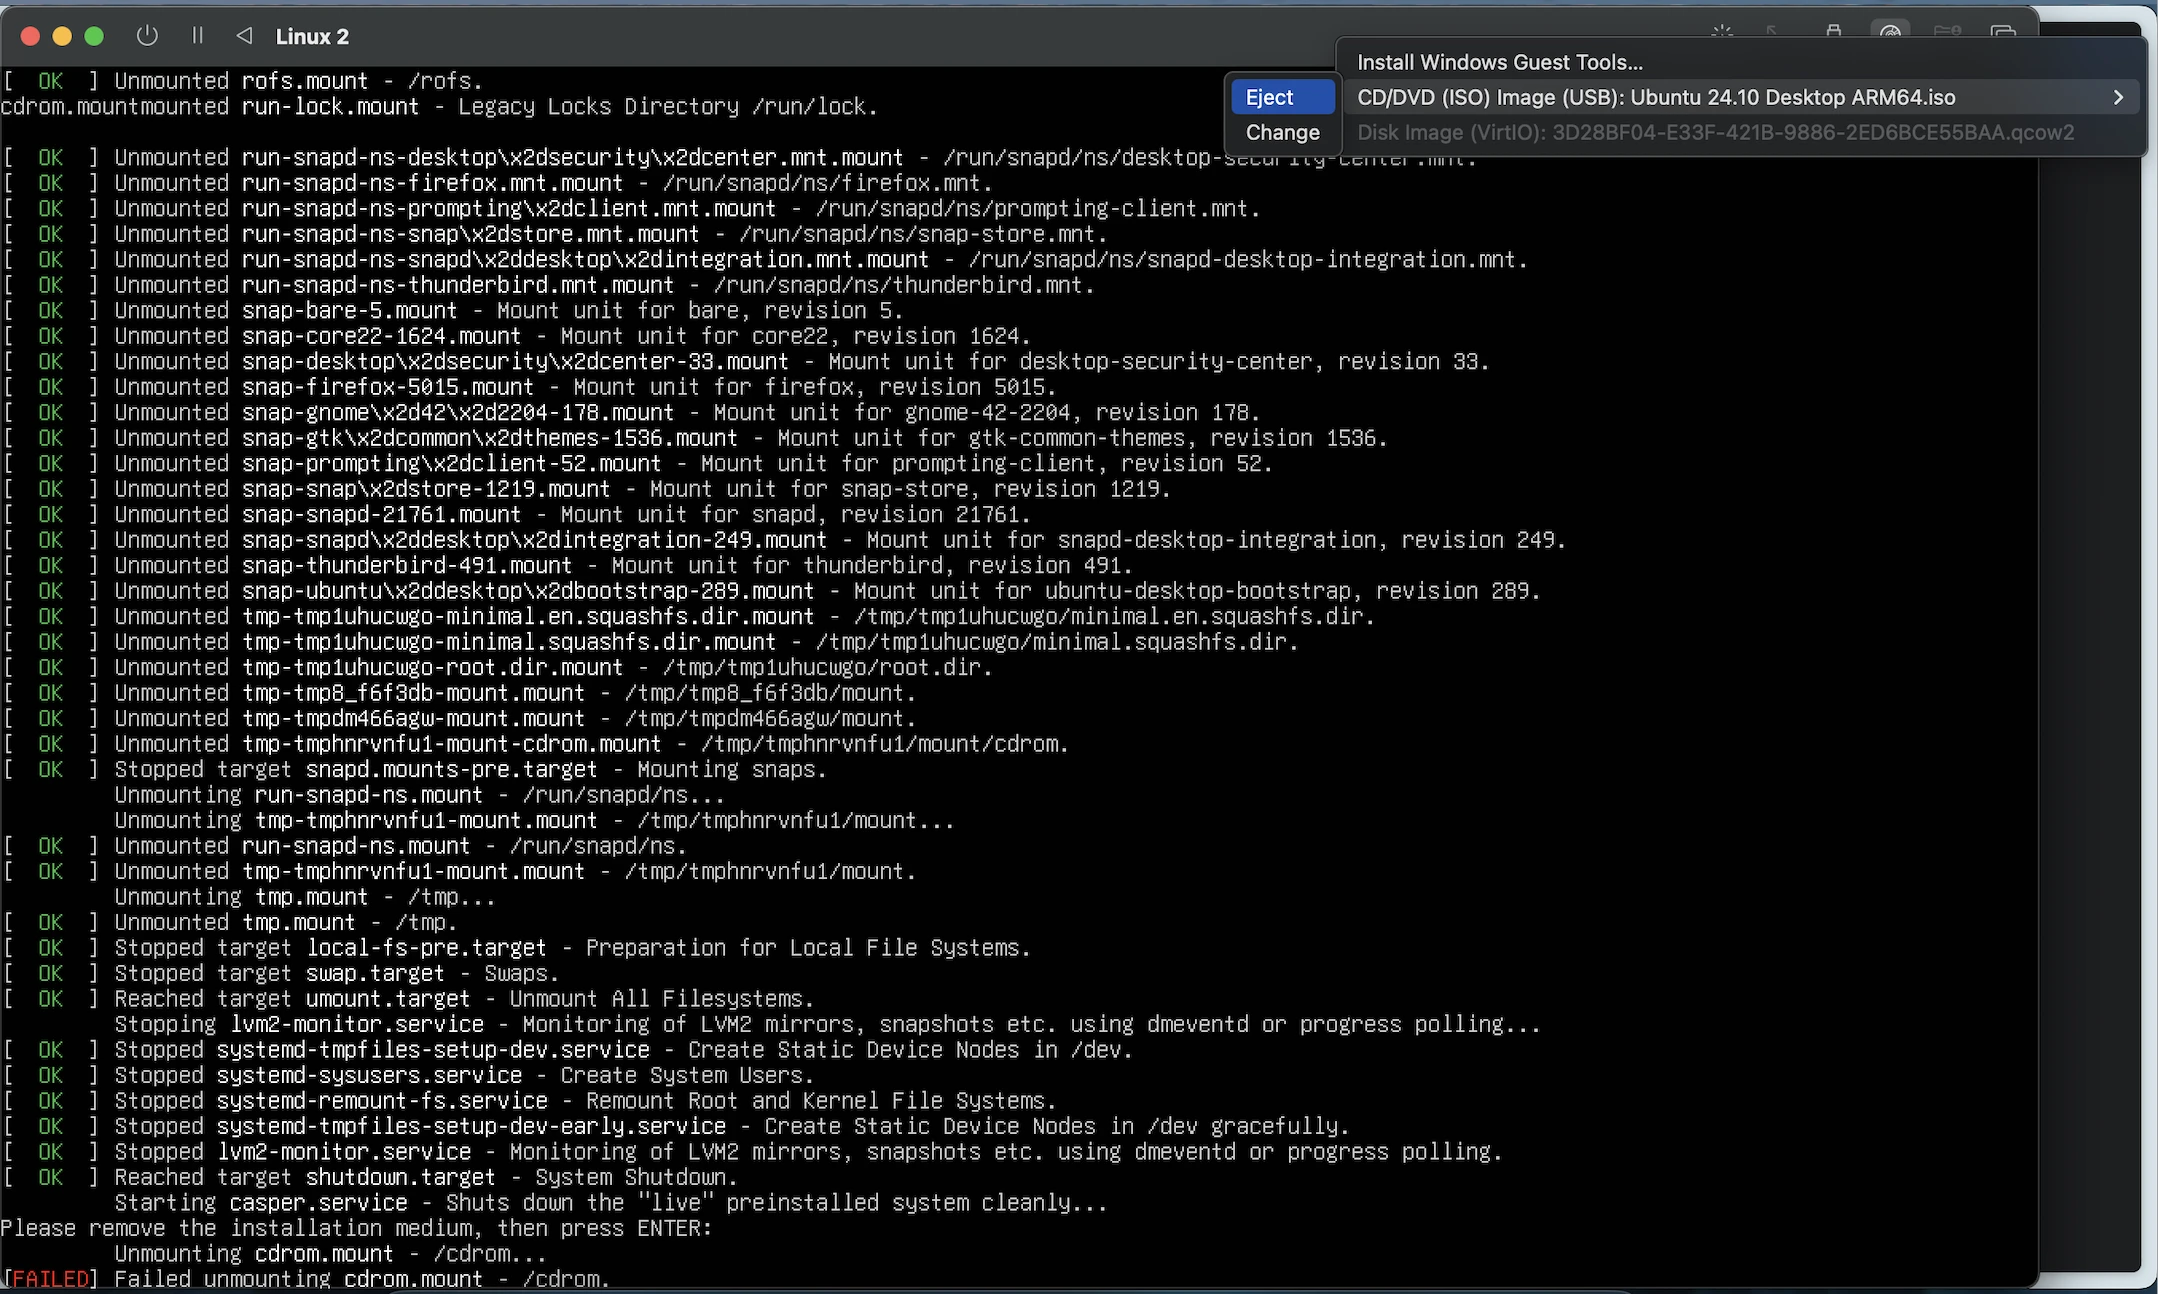
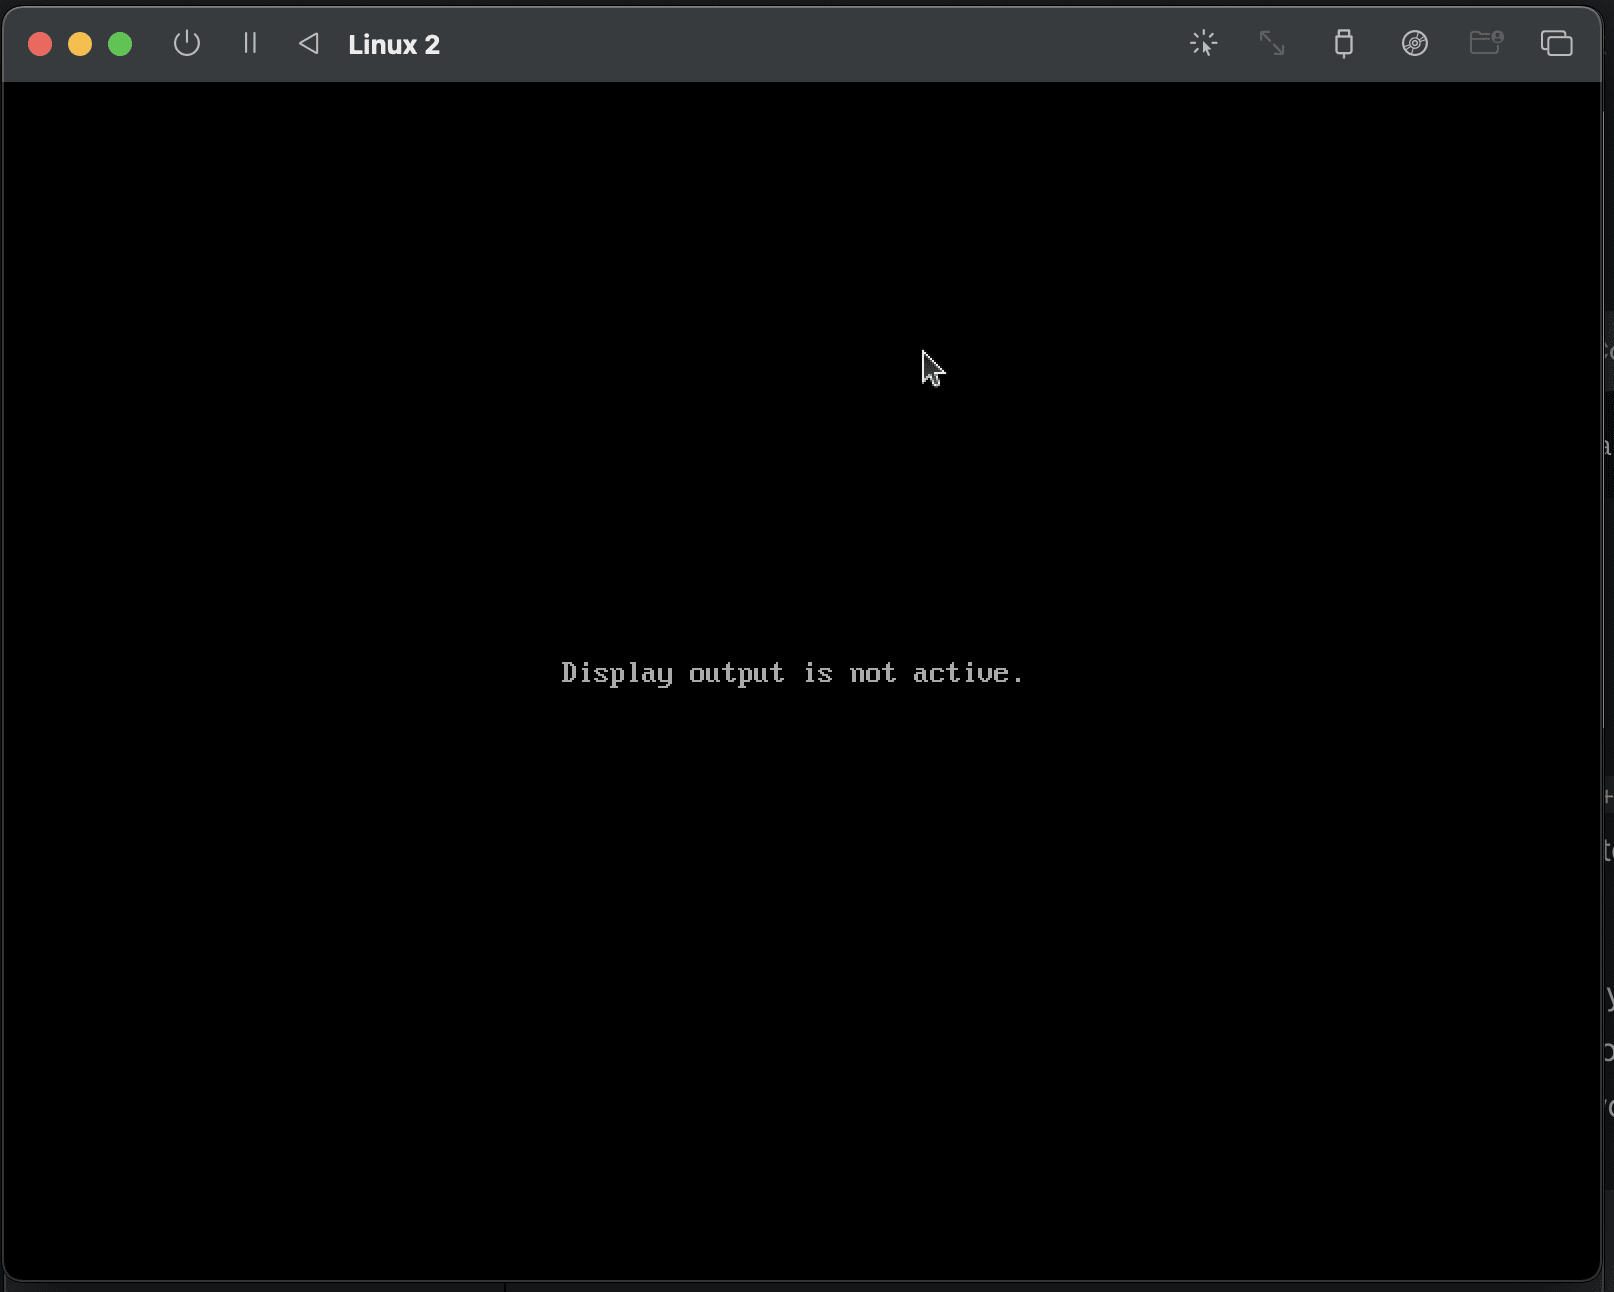
The VM now boots into Ubuntu. If using QEMU, a “Display output is not active” message may appear briefly. Wait 1-2 minutes for the desktop to load.
Once the desktop loads, you should see the following:
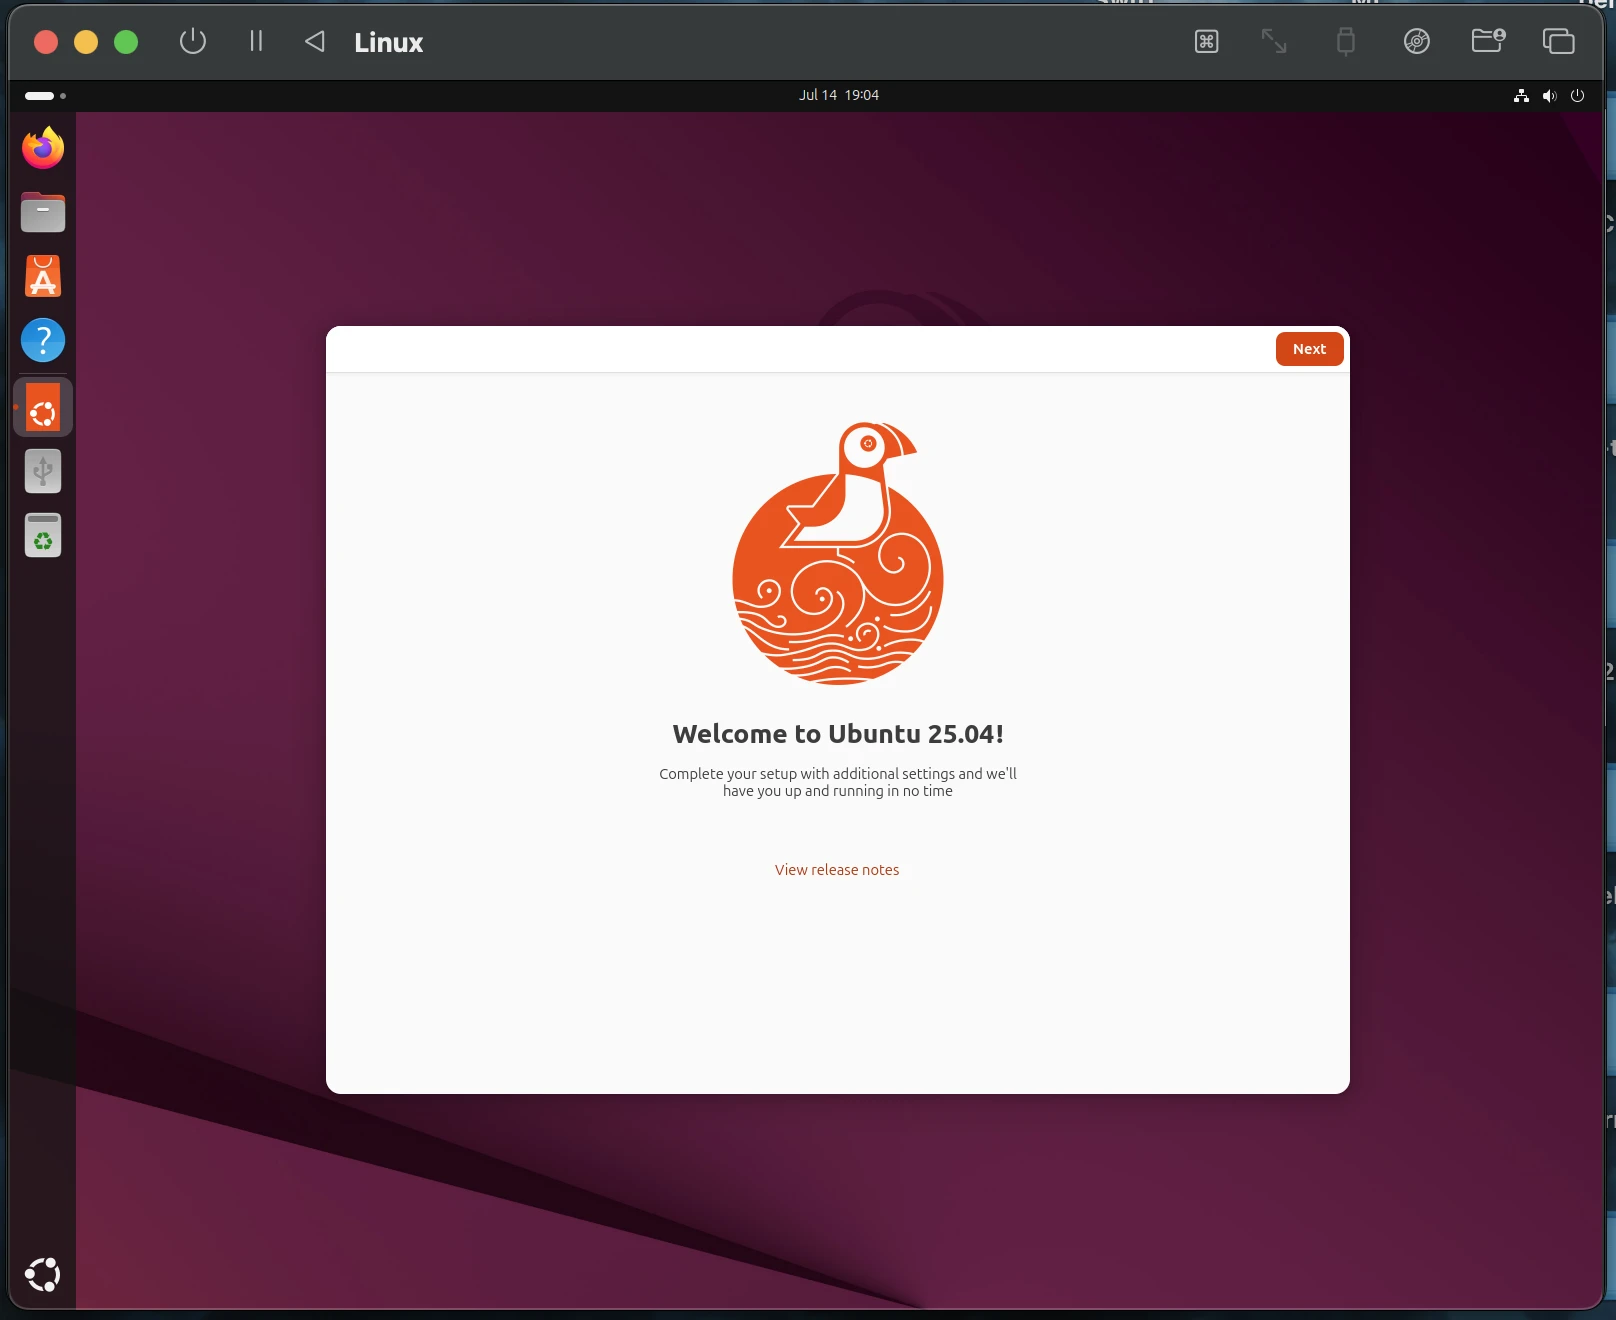
- Select Next to continue.
- Set whether to share data to help improve Ubuntu, then select Next.
- Select Finish
The virtual machine is now ready to use. The next step is improving the display scaling.
Additional Notes
To enhance usability, adjust the display settings for better resolution.
Resolution
Apple Virtualization
- Stop the VM if running (right-click and select Stop).
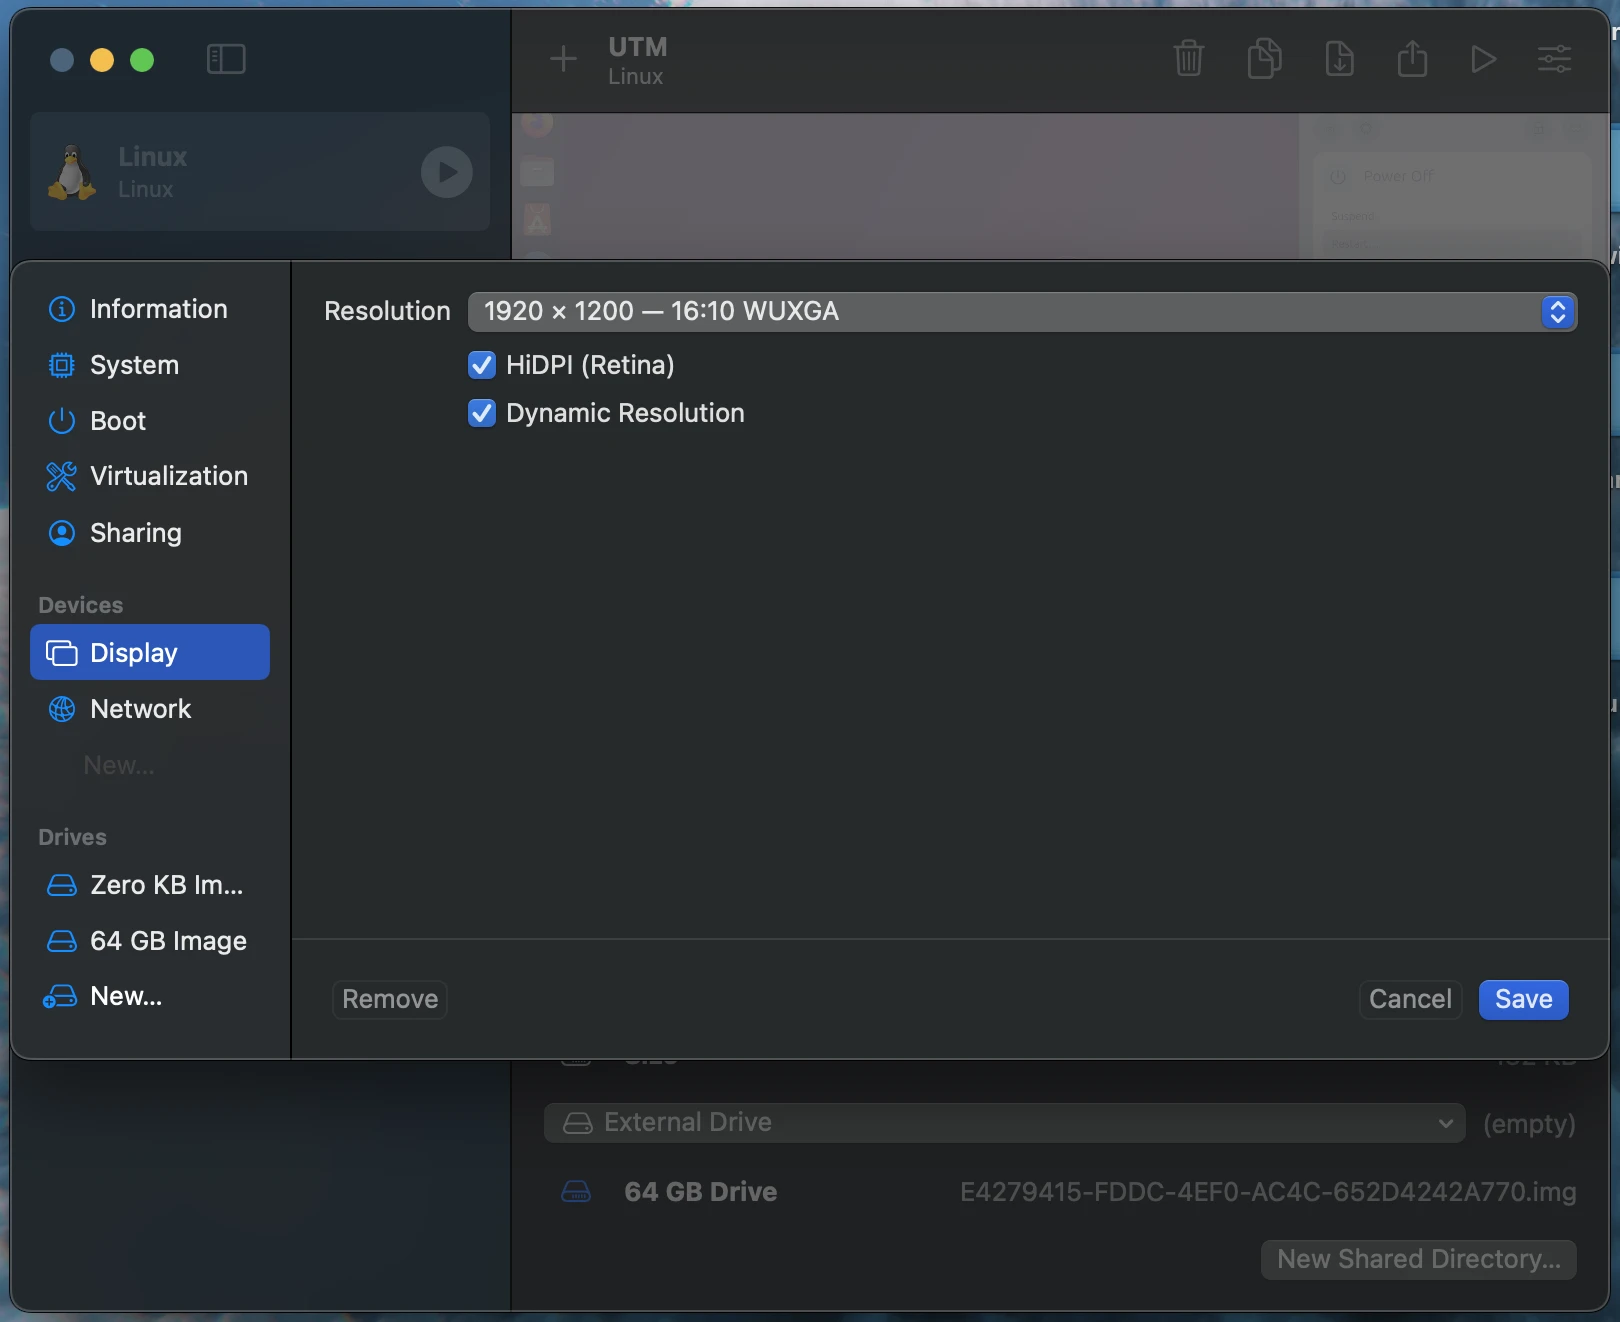
- Right-click the VM, select Edit, and go to Display.
- Enable HiDPI (Retina) and keep dynamic resolution enabled.
QEMU
- Stop the VM, edit it, and navigate to Display.
- Check Retina Mode to enable high-resolution scaling, click Save.
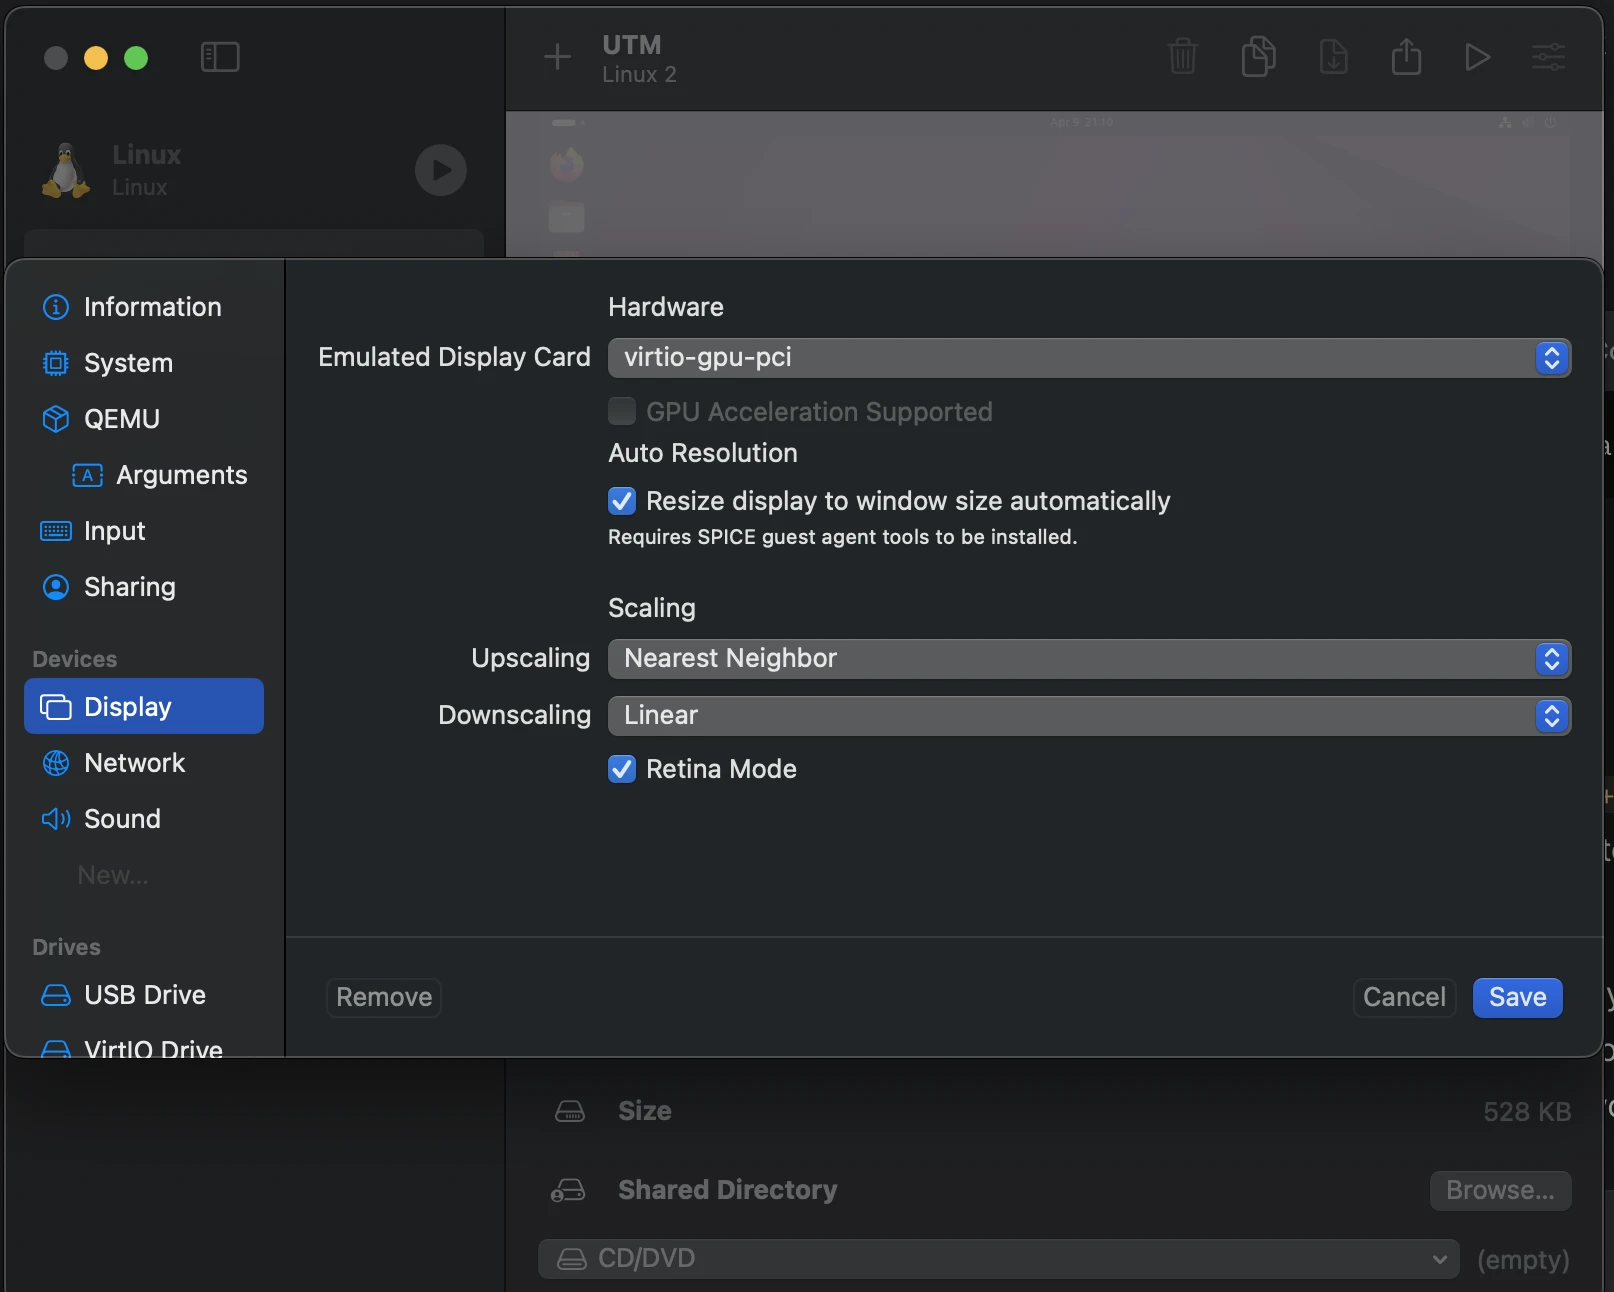
- Boot the VM. The user interface may appear small.
- In Ubuntu, open Settings, select Display, and set Scale to 200% then select Apply.
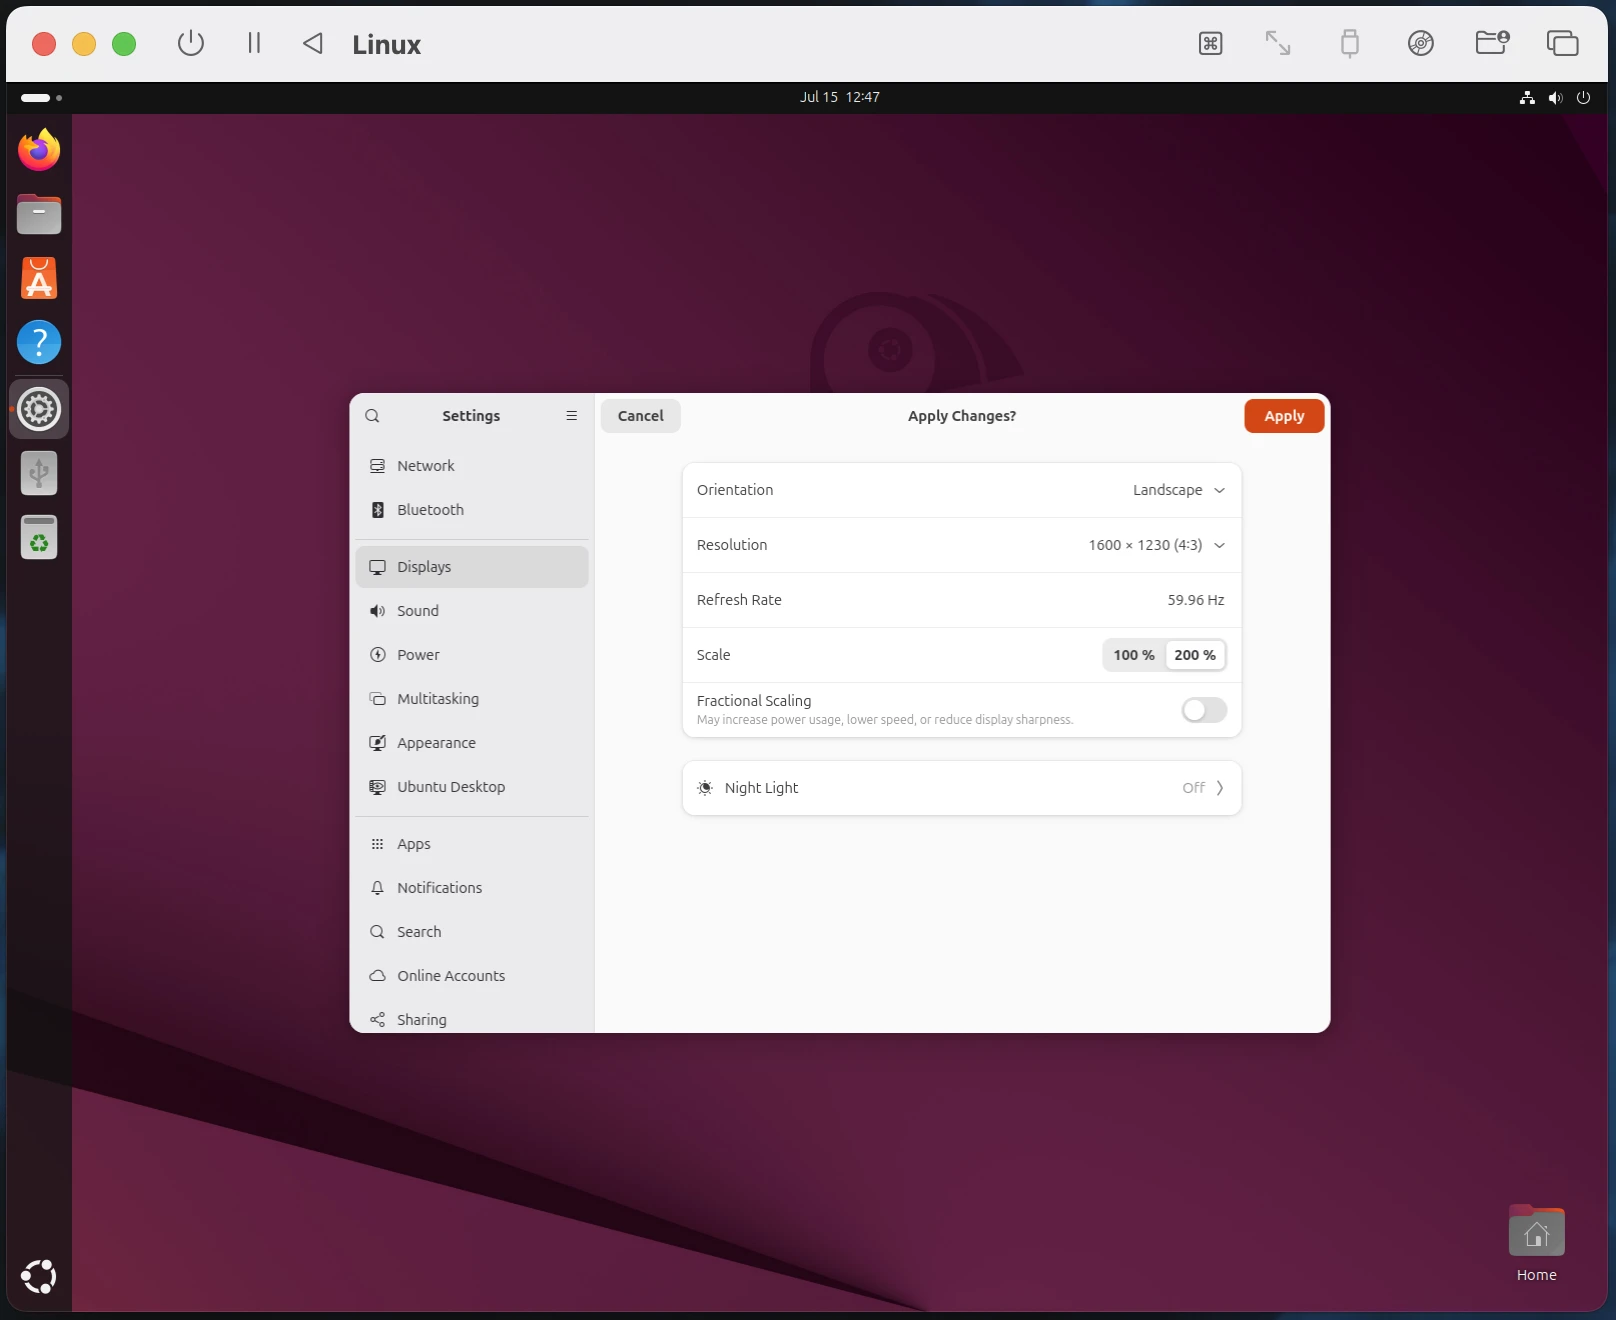
The desktop now uses native macOS resolution for clarity.
Finally, update Ubuntu's packages. Open the menu, select Software Updater, and install available updates to ensure optimal performance.
Issues (QEMU)
A “Display output is not active” message may appear during QEMU boot. Wait 1-2 minutes for the desktop to load. The Community discussion suggests workarounds that may resolve this for your setup.
Upgrading
Ubuntu 24.10 has reached end of life and is no longer supported.
Ubuntu 25.04 is the latest ARM release of Ubuntu. This update is supported until January 2026.
Read the Changelog
Changes noticed from 24.10 - 25.04:
- Added Accessibility and Encryption options during install
- Maximum display scaling is now 200%.
ARM desktop builds will continue on a 9-month release cycle until a new LTS is available
Conclusion
That's it! You've now got Ubuntu 25.04 running natively on Apple Silicon with full GUI support. Whether you're testing code, learning Linux, or just exploring, this VM setup gives you flexibility with solid performance.
If you found this guide helpful, consider checking out our other virtualization tips — or share this with a fellow Mac/Linux enthusiast!
